Category Archives: TOP Tools

Using ipconfig in Windows 10

To find the IP address of the PC you are using, use the following steps:

  1. Left click on the Windows icon on the taskbar
  2. Click on Search
  3. In the lower left of the screen, type cmd to display the IP address of your PC
  4. Type ipconfig /all to see all associated IP addresses – physical address, default gateway, subnet mask, DHCP server, DNS server,  etc.
  5. Review your IP information displayed
  6. Type exit to return to the desktop


TeamViewer Installation

TeamViewer is a comprehensive remote access, remote control, and remote support solution that works with almost every desktop and mobile platform, including Windows, macOS, Android, and iOS. TeamViewer lets you remote in to computers or mobile devices located anywhere in the world and use them as though you were there. Plus, you can remotely connect to servers, commercial-grade machines, and IoT devices from anywhere, at any time through our secure global remote access network.

Main Features:

– Establish incoming and outgoing connections between devices
– Real-time remote access and support
– Collaborate online, participate in meetings, and chat with others
– Start using TeamViewer for free immediately after downloading

Mindware Corporation uses TeamViewer for accessing a customer’s Windows PC’s (not Linux servers) for additional support and is free to download.

To download TeamViewer, enter this link in your browser:

https://www.teamviewer.com/en-us/download/windows/

Select Default Installation

Install and run the program. It will give you an ID and Password to be used for remote access and will create an icon on your desktop. You will need to email Mindware the ID and password for us to use if we need to connect on our end.

Mapping Network Drives in Windows 10

Below are the mapped network drive settings used with Linux and Unix. A valid Linux/Unix user/password must be used to map a drive to the Windows PC. The Windows PC will use the Windows user/password as the default. User should be set as administrator.

  • Drive Letter: R   Path: \\192.168.1.2\top (Used for UPS Worldship and FedEx Interface)
  • Drive Letter: S   Path: \\192.168.1.2\share
  • Drive Letter: T   Path: \\192.168.1.2\top_text
  • Drive Letter: U   Path: \\192.168.1.2\top_export
  • Drive Letter: V   Path: \\192.168.1.2\top_import
  • Drive Letter: W  Path: \\192.168.1.2\top_remote

Click on This PC  ->  Select Computer Tab  ->  Click Map Network Drive

Select the drive letter to map or click on the down arrow to display the drive letters (i.e. S for share drive)

Enter one of the specified folders listed above (i.e. \\192.168.1.2\share)

Click Reconnect at sign-in  ->  Click Finish

Note: To disconnect a network drive,  Click on This PC  –>  Select Computer Tab  –>  Select Map Network Drive  –>  Select Disconnect Drive and enter the drive letter to disconnect  –>  Select OK

Password Setup in Total Order Plus

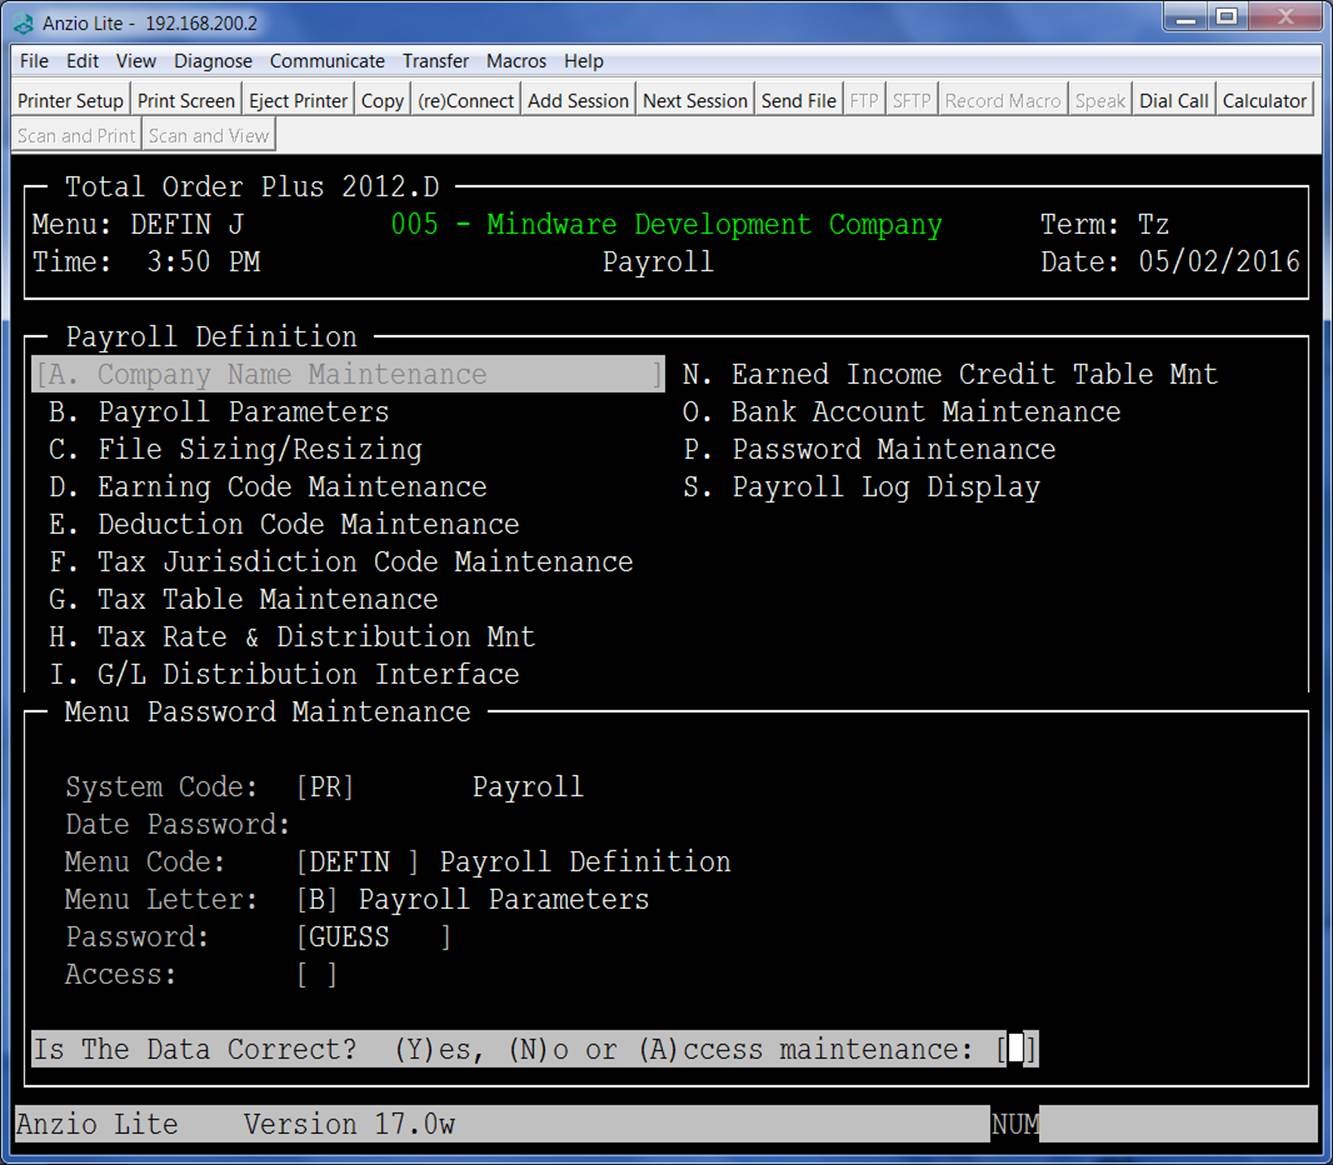
TOP users can access the Password Maintenance program on the Definition Menu in each accounting module to setup passwords in TOP. You can also use this feature to view current passwords already setup in TOP – sometimes we forget!

The System Code module name displays automatically.

You will need to know the name of the menu which is located in the upper left hand corner of each screen.  You can press F1 to display all of the menu names within the module or press F2 to enter a date password for the module displayed.

Enter the letter on the menu that corresponds to the menu item you want to password or press F1 to display all of the items on the menu selected.

Type the password for your selection. Upper or lower case does not apply.

Access options are to leave the field blank so all users are allowed to access this menu selection or you can select the Allow option to let specific users access this menu selection or the Disallow option to keep them from accessing this selection.

Notes:

If you select the allow or disallow options, you will need to specify which users will be or not be allowed to access this menu selection, which will require you to know the user’s TOP login name. You will need to decide if the user will be able to make changes to this menu selection of just have Read Only rights.

MENU SETUP TOP


Initialize DVD discs for BackupEdge

If your BackupEdge software requires using a DVD for your nightly backup, it is usually helpful to initialize the discs prior to use. The discs must be DVD-RW in order to work. The initialization will not work for customers who use DVD-R discs. Some disc drives perform much better with the read/write capability. To initialize DVD-RW discs, perform the following:

Insert a DVD-RW into the disc drive on your server

Notes:

If you have a Red Hat Linux server, it is possible that you have a Blu Ray DVD drive installed. You can check with Mindware for that information. If the drive is Blu Ray, we recommend using dual layer VERBATIM Blu- Ray Media  BD-RE DL  50GB 2X for best results.

Log in as root to get to the # prompt  ->  type  edgemenu  to launch the BackupEdge software menu

Enter the letter A or use your right arrow key to highlight the Admin tab  ->  Select Initialize Medium  -> Press the Enter key once the Initialize Medium is highlighted

‘This will erase all data on this medium’ message will display  ->  Press the Enter key for ‘Erase It’

The initializing will display a message that the process has begun and once it is complete, a message will display that the process was successful. Press the Enter key to return to the menu.

Type the letter F or use your left arrow key to highlight File  ->  Select X or use your down arrow to select exit  ->  Type exit at the # prompt to return to the system login prompt


Inventory Item History Purge

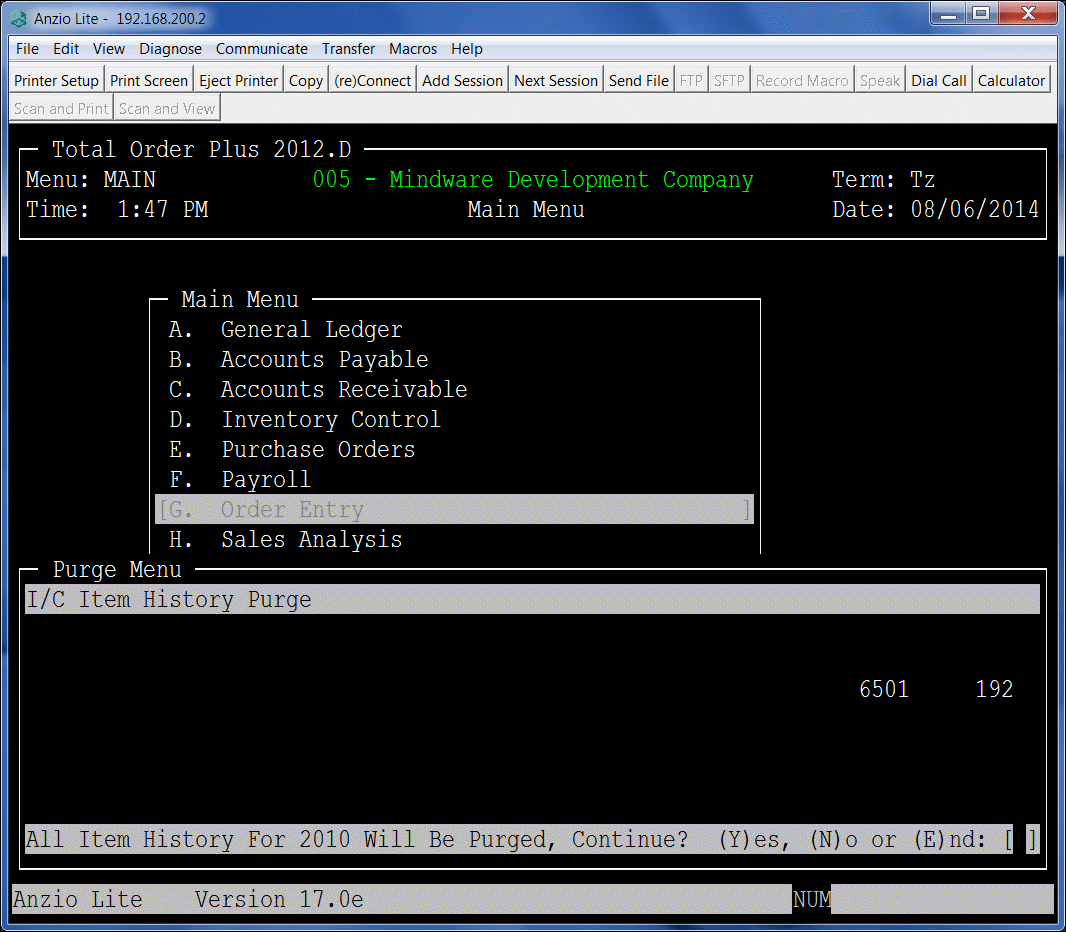
Total Order Plus accumulates important invoice data into multiple history files on a daily basis. The files are of a dynamic, multi-keyed structure, which means they continue to increase in size and should be purged on some kind of a time table. In the Business Basis language, there is a maximum file size limit. If a file reaches the maximum, you will not be able to access the file or to down size it to it’s current size. As the file capacity increases, the size of the hard drive decreases as well.

The Inventory Item History Sales Purge program is located on the PM Options Menu. To access the purge programs, type ?PM at the TOP Main Menu and Select G. I/C Item Hist. You will be asked to enter a year to purge. All item sales for that year will be purged.

The Item History Display program is on the Inventory Master Sub-Menu . There is also a hard copy print program Item History Report on the Inventory Control Report Menu.

Item_Sales_purge

Customer Product Sales Purge

Total Order Plus accumulates important invoice data into multiple history files on a daily basis. The files are of a dynamic, multi-keyed structure, which means they continue to increase in size and should be purged on some kind of a time table. In the Business Basis language, there is a maximum file size limit. If a file reaches the maximum, you will not be able to access the file or to down size it to it’s current size. As the file capacity increases, the size of the hard drive decreases as well.

The Customer Product Sales Purge program is located on the PM Options Menu. To access the purge programs, type ?PM at the TOP Main Menu and Select C. Cust Prod Sales. You will be asked to enter a year to purge. All product sales for that year will be purged.

The Customer Sales by Product display program is on the Customer Master Sub-Menu . There is also a hard copy print program on the Accounts Receivable Customer Sales Report Menu.

Purchase Order History Purge

Total Order Plus accumulates important invoice data into multiple history files on a daily basis. The files are of a dynamic, multi-keyed structure, which means they continue to increase in size and should be purged on some kind of a time table. In the Business Basis language, there is a maximum file size limit. If a file reaches the maximum, you will not be able to access the file or to down size it to it’s current size. As the file capacity increases, the size of the hard drive decreases as well.

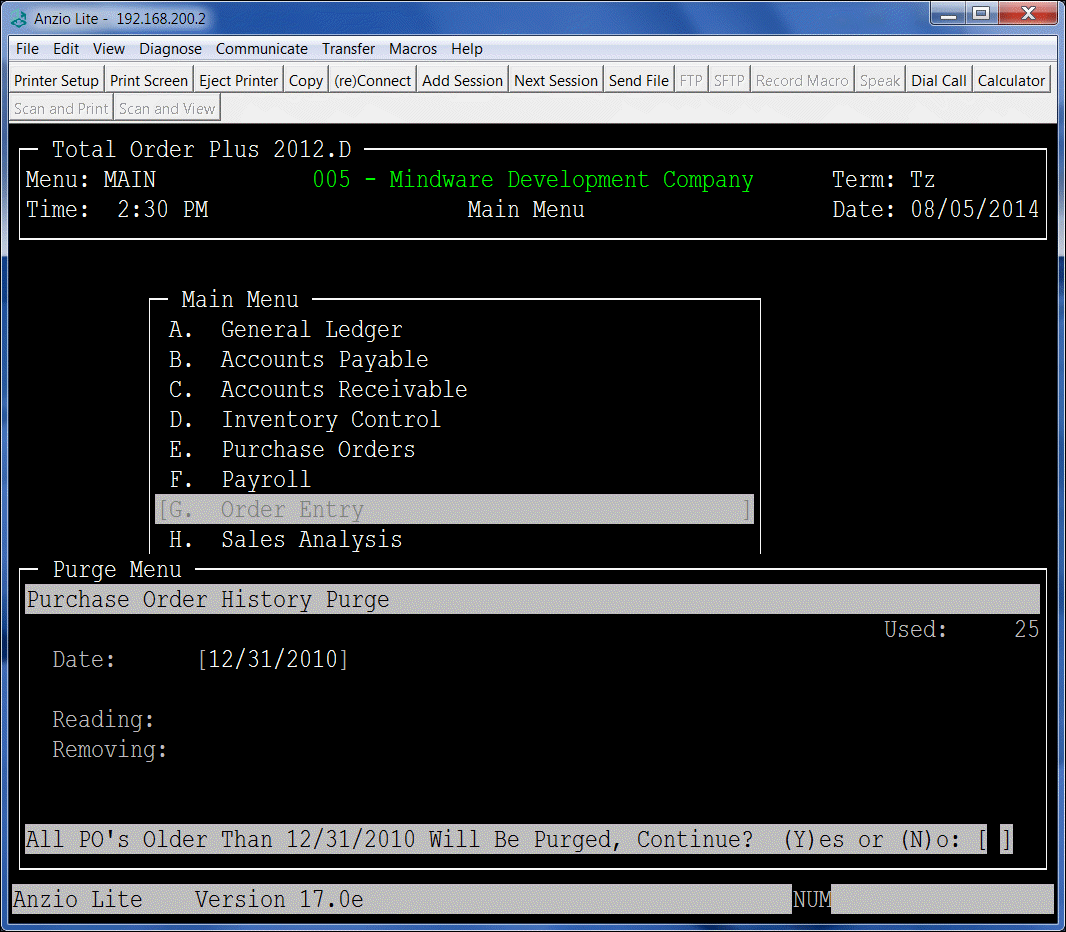
The Purchase Order History Purge program is located on the PM Options Menu. To access the purge programs, type ?PM at the TOP Main Menu and Select F. P/O PO History. You will be asked for an ending date to purge. All purchase orders older than the date entered will be purged.

The Purchase Order History display program is on the Purchase Order Options Menu. There are also hard copy print programs on the Purchase Order Report Menu.

PO_purge

Accounts Payable Invoice, Check History Purge

Total Order Plus accumulates important invoice data into multiple history files on a daily basis. The files are of a dynamic, multi-keyed structure, which means they continue to increase in size and should be purged on some kind of a time table. In the Business Basis language, there is a maximum file size limit. If a file reaches the maximum, you will not be able to access the file or to down size it to it’s current size. As the file capacity increases, the size of the hard drive decreases as well.

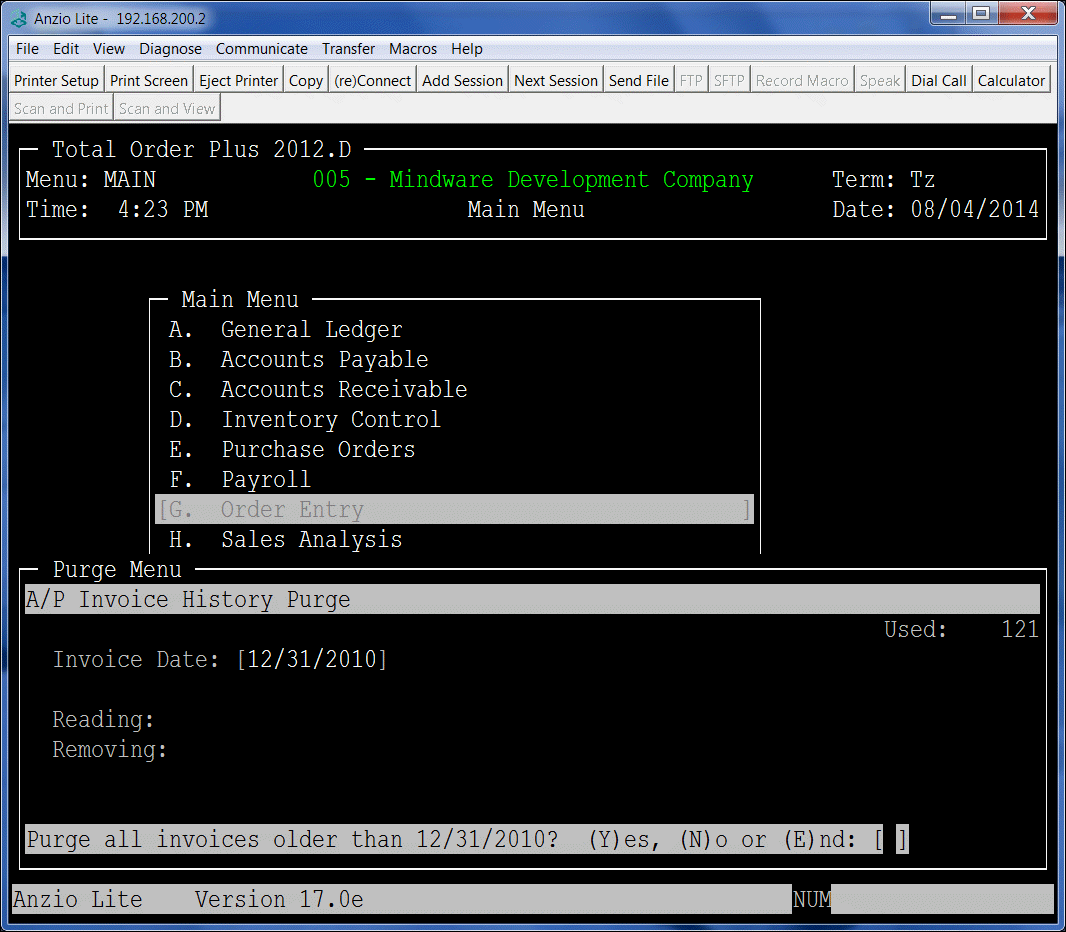
The Accounts Payable History Purge programs are located on the PM Options Menu. To access the purge programs, type ?PM at the TOP Main Menu and Select D. A/P Inv History or E. A/P Chk History. You will be asked for an ending date to purge. All invoices and checks older than the date entered will be purged.

The Accounts Payable Invoice and Check History display programs are on the Accounts Payable Options Menu. There are also hardcopy print programs on the Accounts Payable Report Menu.

Accounts_Payable_purge