Category Archives: TOP Purchase Orders

Purchase Order History Purge

Total Order Plus accumulates important invoice data into multiple history files on a daily basis. The files are of a dynamic, multi-keyed structure, which means they continue to increase in size and should be purged on some kind of a time table. In the Business Basis language, there is a maximum file size limit. If a file reaches the maximum, you will not be able to access the file or to down size it to it’s current size. As the file capacity increases, the size of the hard drive decreases as well.

The Purchase Order History Purge program is located on the PM Options Menu. To access the purge programs, type ?PM at the TOP Main Menu and Select F. P/O PO History. You will be asked for an ending date to purge. All purchase orders older than the date entered will be purged.

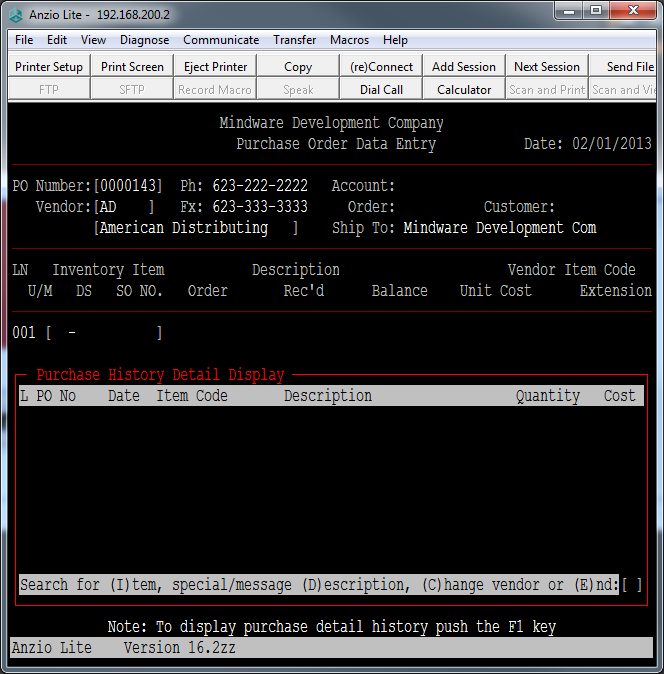
The Purchase Order History display program is on the Purchase Order Options Menu. There are also hard copy print programs on the Purchase Order Report Menu.

PO_purge

UnForm Parameter Maintenance

The Accounts Payable, Accounts Receivable, Purchase Order and Order Entry modules each have an UnForm Parameter Maintenance program on each of the above mentioned Definition Menus. You are able to set up parameters for each form you want printed in TOP:  checks, statements, purchase orders, orders, invoices and quotes.

Forms names to be used are displayed at the bottom of your screen: CHECK, PO, STATEMENT, ORDER, INVOICE and QUOTE. You can set up a maintenance screen for each division of your company, if applicable, and assign a specific printer for each form.

You can have a custom logo file made with your company information and assign column and line print positions of where you want the logo to print on each form.

You can have up to four copy descriptions, pricing or no pricing, screening or no screening and designate which paper tray on each printer.

You can enter up to two message lines and select either plain, bold or italic or a combination for the message lines format.

Notes:

To view the TOP Help Menu, you can press CTRL+Y at each input field to view the help options.

UNFORM_PARAM

Change Vendor From PO History Detail

While entering a PO, you can insert items purchased from other vendors into a new purchase order. This can be useful when multiple vendors carry the same item or when one vendor purchases another vendor.

The option is available from the Purchase History Detail Display (see below). This screen is accessed from the PO Detail Item Code entry after pushing the F1 key for history detail and selecting the Change Vendor option.

PO_Hst_Dtl_Vend_Chg

Insert PO Line Number

To insert a line number in a purchase order, there must be a line number available.
At the item number input field, press F2 to go back to the line number input field and put in the line number to insert.

Another option is to remove line items that you want to insert.

As you are entering line items on a purchase order, you might want to consider using (M)essage lines between line items so you can go back and insert lines later.

Once you re-display the line item detail, the inserted line items will display
in their proper location.