Before setting up Stamps.com to interface with TOP, you should first setup the items below.
Setup TOP Integration
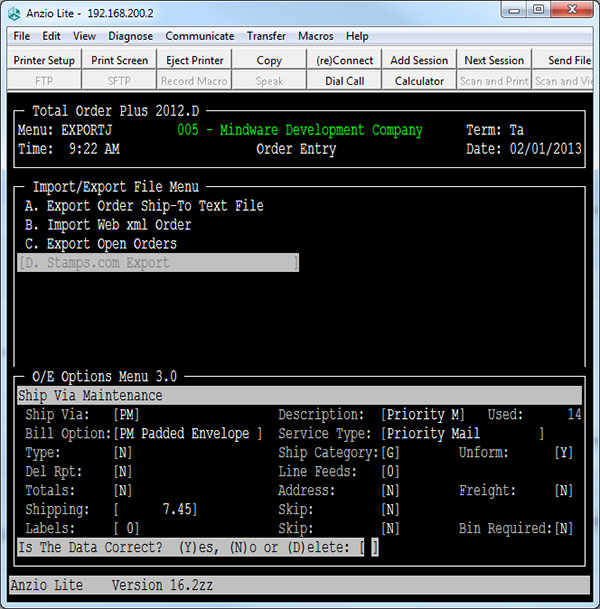
TOP Ship Via Code
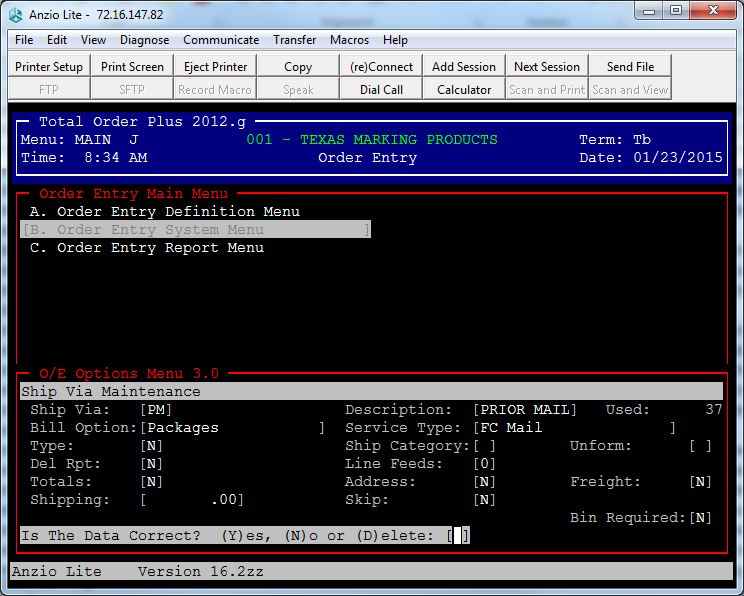
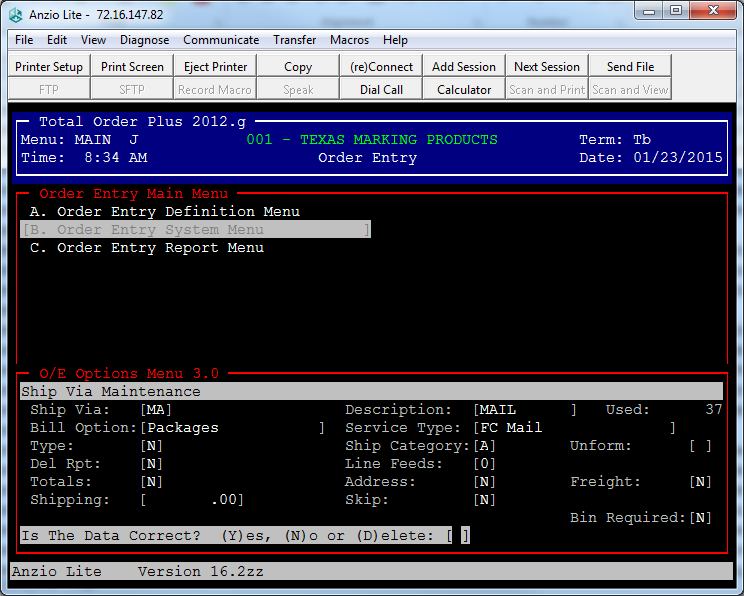
To setup TOP integration only requires setting up two additional ship via parameters. The Ship Via Maintenance can be found on the O/E Options Menu.
PM – Priority Mail Bill Option: Packages Service Type: FC Mail
MA – Mail Bill Option: Packages Service Type: FC Mail
Map V Drive on Shipping PC
To transfer data between the server and the shipping, you will need to Map the V drive on PC to \\192.168.1.2\TOP_IMPORT. For how to map a drive select this link.
Stamps.com Export
Run Stamps.com Export from the TOP O/E Import/Export File Menu to create the STAMPS_COM.csv file. This will be needed before continuing to the steps below.
- Start Stamps.com if not running
- Select <Manage Profile> from profile pull-down menu
- Select New button
- Select CSV/TextFile (*.csv or *.txt)
- Select Next
- Enter TOP_SC001 for Profile Name (001 is for company 1 in TOP)
- Select Next
- Select Create a new data source
- Select Next
- Select Text/CSV File
- Select Next
- Enter V:\CO001\SC for Location
- Select Next
- Select Test Connection -> Select OK
- Select Next for Confirm Connection
- Select STAMPS_COM.csv for Database Table
- Select Auto Match button
- Select OK for Auto Matching Done
This should map the following fields:
Package Tab:
- Order ID: ORDER_NUMBER
- Order Date: ORDER_DATE
- Package Value: PACKAGE_VALUE
Shipping Options Tab:
- Mailpiece: MAIL_PIECE
- Mail Class: MAIL_CLASS
- Printed Message: PRINT_MESSAGE
Recipient Tab:
- Full Name: FULL_NAME
- Company: SHIPTO_COMPANY
- Address 1: SHIPTO_ADDRESS1
- Address 2: SHIPTO_ADDRESS2
- City: SHIPTO_CITY
- State: SHIPTO_STATE
- ZIP/Postal Code: SHIPTO_ZIP
- Country: SHIPTO_COUNTRY
- Email: SHIPTO_EMAIL
Return Address:
- Company: RETURN_COMPANY
- Address 1: RETURN_ADDRESS1
- Address 2: RETURN_ADDRESS2
- City: RETURN_CITY
- State: RETURN_STATE
- ZIP/Postal Code: RETURN_ZIP
Second Step From Stamps.com
- Select Shipping Options Tab
- Select Mailpiece button (Import and PostBack use the same table for Mailpiece)
- Select Maps To pull down menu
- Select an option (like Package)
- Enter the TOP Ship Via Service Type (example Priority Mail) in the New Code field
- Select Add
- Select Save after entering Mailpiece codes
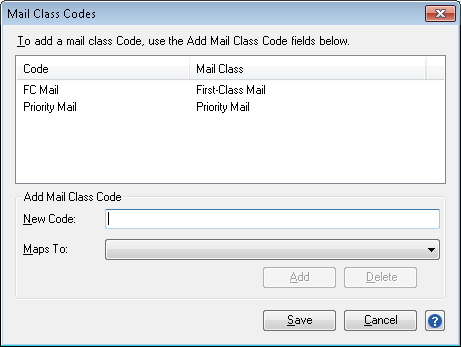
- Select Mail Class button (Import and PostBack use the same table for Mail Class)
- Select Maps To pull down menu
- Select an option (like Priority Mail and First Class Mail)
- Enter the TOP Ship Via Service Type (example Priority Mail and FC Mail) in the New Code field
- Select Add
- Select Save after entering Mail Class codes
- Select Next
- Select Same data source
- Select Next
- Map the field like below for Postback Data

Package Tab:
- Order ID: ORDER_NUMBER
- Mail Piece: POSTBACK_MAIL_PIECE
- Mail Class: POSTBACK_MAIL_CLASS
- Mail Date: POSTBACK_MAIL_DATE
- Postage Amount: POSTBACK_TOTAL_COST
- Status: POSTBACK_STAT
Third Step From Stamps.com
- Select Mailpiece button
- Select Maps To pull down menu
- Select an option (like Packages)
- Enter the description to display in TOP (example Packages) in the New Code field
- Select Add
- Select Save after entering Mailpiece codes
- Select Mail Class button
- Select Maps To pull down menu
- Select an option (like Priority Mail)
- Enter the description to display in TOP (example Priority Mail) in the New Code field
- Select Add
- Select Save after entering Mail Class codes
- Select Next
- Select Done
- Select Done
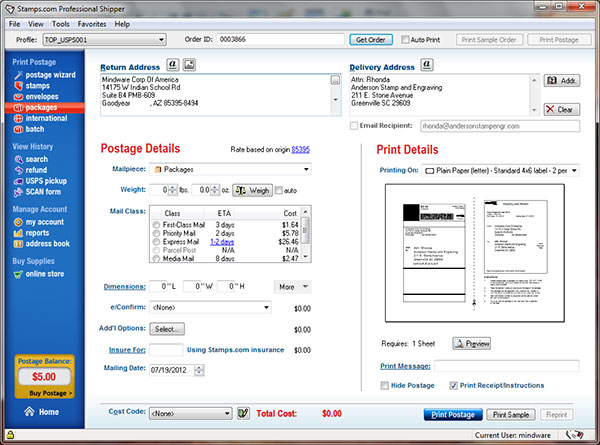
To use interface select TOP_SC001 profile, then enter TOP order number for Order ID field and select Get Order. Below is a screen example from Stamps.com after selecting Get Order.
Notes:
- The Stamps.com Export must be run before new orders/invoices can be pulled up in Stamps.com.
- When the Stamps.com Export is run, it also checks for Stamps.com shipped orders and uses that information to also update TOP.
- The Find Order/Invoice Utility is used to display shipping information. For more info on displaying the order shipping info select this link.
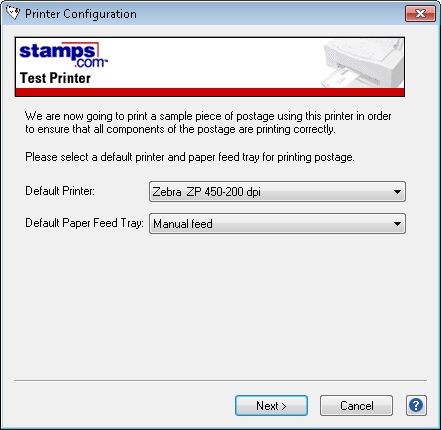
You can add a printer for the labels. See example below:


