Author Archives: Joanne Simmons

Red Hat Linux Samba Password

If  your operating system is Red Hat Linux and you want a user to have access to the Share, Export, etc. folders on the TOP server,  the command to change the Samba password is:

Login:  root

Password:  ask system supervisor

At the command prompt, type

#  smbpasswd  -a  username   (same login name that is used to login to TOP)

New SMB password:

Retype new SMB password:

#  exit

Red Hat Linux User Password

If  your operating system is Red Hat Linux, the command to change the user password is:

Login:  root

Password:  ask system supervisor

At the command prompt, type

#  passwd   username   (same login name that is used to login to TOP)

Change password for user username

New Password:

Retype new password:

passwd:  all authentication tokens updated successfully.

SCO Unix Samba Password

If  your operating system is SCO Unix and you want a user to have access to the Share, Export, etc. folders on the TOP server,  the command to change the Samba password is:

Login:  root

Password:  ask system supervisor

At the command prompt, type

#  smbpasswd   username   (same login name that is used to login to TOP)

New SMB password:

Retype new SMB password:

#  exit

SCO Unix User Password

If  your operating system is SCO Unix, the command to change the user password is:

Login:  root

Password:  ask system supervisor

At the command prompt, type

#  passwd   username   (same login name that is used to login to TOP)

You can choose whether you pick a password
or have the system create one for you:

1. Pick a password
2. Pronounceable password will be generated for you

Enter New password: choice (default is 1):  Select 1.  Pick a password

Please enter new password:

Re-enter password:

#  exit


Change IP Address on Lexmark Printers

Every printer has been assigned an IP address on the factory settings. To use a printer on your TOP network, you must change the IP address to an IP address in the 100 range – i.e. 192.168.1.101, 102, 103, etc.

You have a Printer Control Menu on the printer that you can use to print out a configuration page that will show all of the settings. You must change the TCP/IP settings to 192.168.1.1xx, Subnet Mask to 255.255.255.0, GW (Gateway) to 192.168.1.1. The printer should be set for DHCP.

For example, if the printer IP is preset to 192.168.1.228, you will access that IP address on your PC in your browser on the network in order to access the changes mentioned above or if your printer has a LCD panel, you can change the settings on the panel.

You can download the manual for your printer on www.lexmark.com in PDF format. There will be instructions on how to access the TCP/IP menu – i.e.  Network/Ports  –>  Standard Network  –>  Standard Network Setup  –>  TCP\IP.

Notes:

This menu is available only to network printers or printers attached to a print server.

‘Order On Hold’ in Total Order Plus Order Data Entry

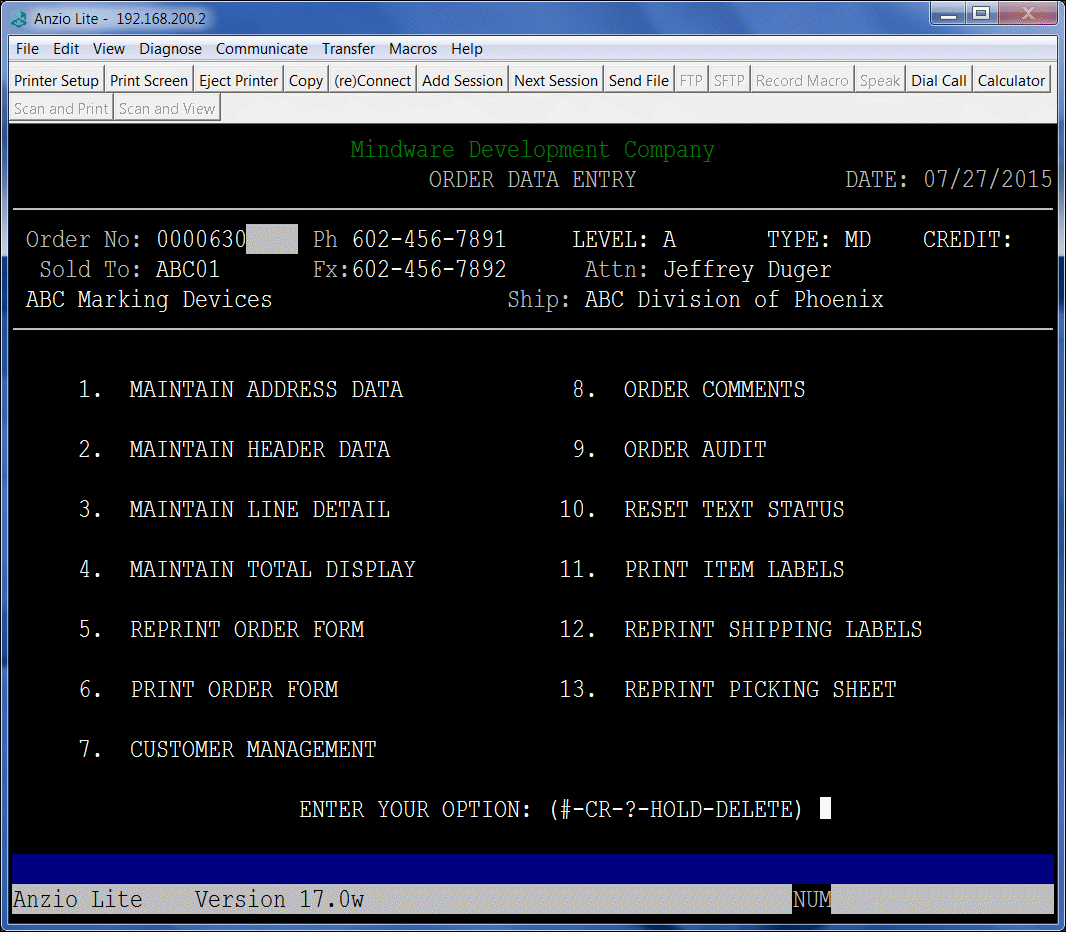
When entering an order in Order Data Entry, you can place an order on hold if you want to make sure the order doesn’t get converted into an invoice while waiting for additional information or for any other reason.

From the TOP Main Menu, select Order Entry  ->  Order Entry System Menu  ->  Order Entry. Enter the order number to display on your screen. Type HOLD at the bottom of the order menu. You will see a flashing ‘HOLD’ next to the order number at the top of your screen. To reverse the hold, display the order on your screen and again type in ‘HOLD’.

ORDER_HOLD

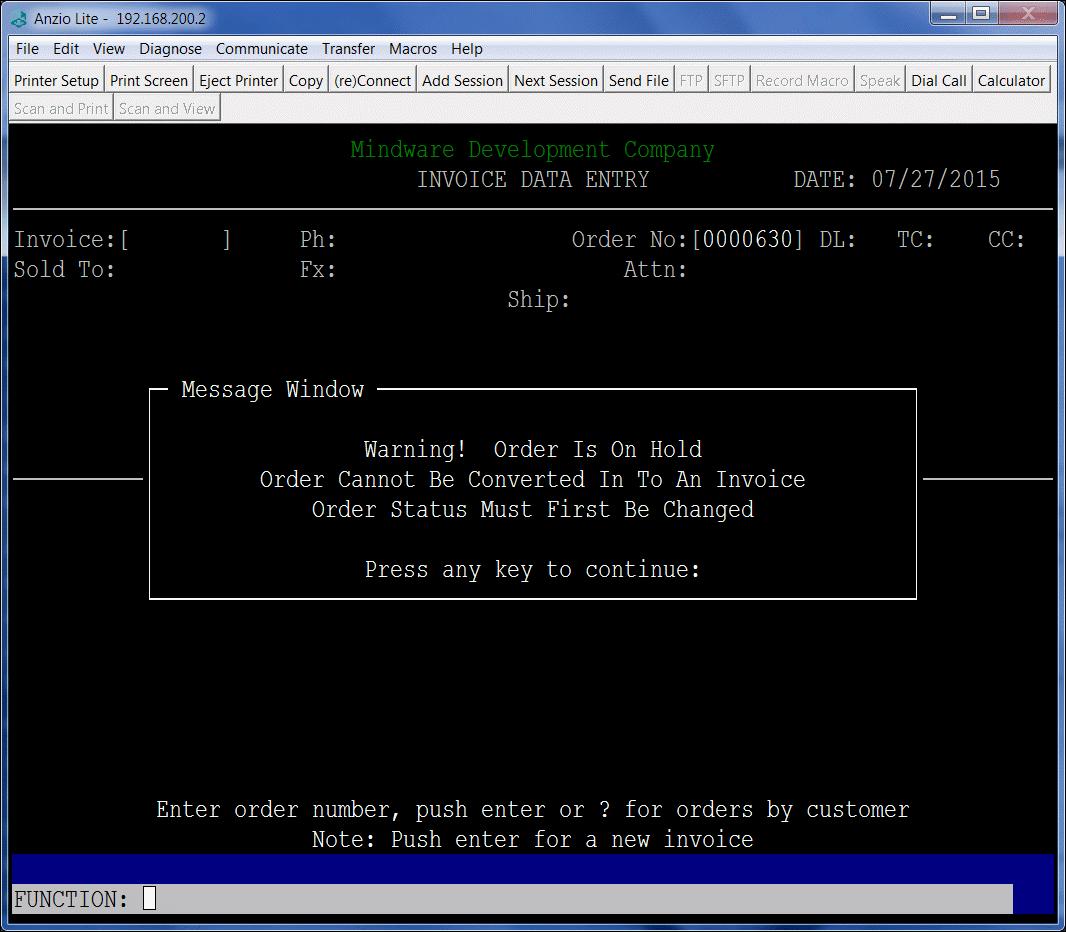
If you want to convert an order on hold into an invoice, you will see this message display on your screen:

HOLD_MESSAGE

Payroll Manual Checks and Reversals

The payroll system allows you to enter manual checks that were not processed through the payroll process, as well as reversing previously written checks issued during a payroll. Void checks can also be entered to track for check reconciliation.

Prior to entering a manual check, you must run A. Pay Cycle Initialization on the Pay Cycle Menu. You will be asked for the Payroll Period Ending Date,  Deduction Period of the month, Pay Cycle (weekly, bi-weekly, semi-monthly, monthly, quarterly or annually). Enter the date you want to print on the check, The current quarter (1-4) automatically displays on the screen. You will be asked to select which earnings and deductions you want for this pay period.  Proceed to Step 1.

1. Select Manual Check Data Entry on the Pay Cycle Menu.

2. Check No: Type the check number you issued to this employee and Enter.

Notes: To reverse a previously written check on the computer, type the check number followed by an R and Enter.

3. Employee No: Type a valid employee number and Enter or type ?+ the Enter key to display the Employee Number Selection window.

4. Check Date: Type the date the check was written in MMDDYY format and Enter.

5. Check Amount: Type the net amount of the check and Enter.

6. Is The Check Information Correct? (Y-N-DELETE): Type Y+ the Enter key if the check header information is correct. Proceed to Step 7. Type N+ the Enter key to edit the check information. Return to Step 4 Type DELETE+ the Enter key to remove the check from the manual check file. Return to Step 2.

7. Code: Type a valid earnings code and Enter or type ?+ the Enter key to display the Earnings Code Selection window. Press F4 to end earnings code input. Proceed to Step 14

8. Dept: The default department code from this employee’s master record displays on your screen. Press the Enter key to accept the code displayed or type ?+ the Enter key to display the Department Code Selection window.

9. W/C: The default worker’s compensation code from this employee’s masterfile displays on your screenPress the Enter key to accept the code displayed or type ?+ the Enter key to display the Worker’s Compensation Code Selection window.

10. Distribution: The G/L distribution account number for this earnings code displays on your screen. The cursor moves to the next input field.

11. Rate: Press the Enter key to accept the rate displayed or override with a new hourly rate. Press F2 to return Step 10 to change the G/L distribution account number.

12. Hours: Press the Enter key to accept the hours displayed for this pay cycle or override with the correct number of hours.

Notes: The cursor will stop at steps 11 and 12 if this earnings code is set up for units and hours in ‘Earnings Code Maintenance’ on the Payroll Definition Menu.

13. Amount: Press the Enter key to accept the calculated amount of rate x hours or type a new amount if this earnings code is not set up as hours and units and Enter.

14. Is The Data Correct? (Y-N-DELETE): Type Y+ the Enter key if this earning code information is correct. Return to Step 7 for the next earnings code entry. Type N+ the Enter key to edit this earning code information. Go to Step 7. Type DELETE+ the Enter key to delete the entire check entry. Return to Step 2.

15. Code: Type a valid deduction code and Enter or type ?+ the Enter key to display the Deduction Code Selection window. Note: The voluntary deduction description and the G/L distribution displays on your screen. The cursor moves to the amount field.

16. Amount: Type the amount of the voluntary deduction and Enter. Press F2 to edit the G/L distribution account number.

17. Is The Data Correct? (Y-N-DELETE): Type Y+ the Enter key if this deduction code information is correct. Return to Step 15 for the next deduction code entry. Type N+ the Enter key to edit this deduction code information. Go to Step 15. Type DELETE+ the Enter key to delete all deduction code entries. Return to Step 15.

18. Federal W/H: Type the amount of the federal tax withheld for this check and Enter.

19. State W/H: Type the amount of the state tax withheld for this check and Enter.

20. Social Security: Type the amount of social security withheld for this check and Enter.

21. Medicare: Type the amount of medicare withheld for this check and Enter.

22. Is The Data Correct? (Y-N-DELETE): Type Y+ the Enter key to accept tax information. Return to Step 2 for the next check entry. Type N+ the Enter key to edit the tax information. Return to Step 18. Type DELETE+ the Enter key to delete the entire check. Return to Step 2.

Notes: Before you exit the screen, the amount of the check must be distributed correctly and the balance must equal zero. If the check is out of balance, you will be prompted to either delete the entire check or press the Enter key to make corrections.

Using the WHO Command

Whether your server is running SCO Unix or Red Hat Linux, to see the user names that are logged into your system you can use the who command. Follow the simple procedure below:

Login:  root

Password: XXXXXX (ask system supervisor)

Type in who at the # prompt:

#  who

The name of each user and the number of times they are logged in will display on your screen. To return to your login prompt, type

# exit


Initialize DVD discs for BackupEdge

If your BackupEdge software requires using a DVD for your nightly backup, it is usually helpful to initialize the discs prior to use. The discs must be DVD-RW in order to work. The initialization will not work for customers who use DVD-R discs. Some disc drives perform much better with the read/write capability. To initialize DVD-RW discs, perform the following:

Insert a DVD-RW into the disc drive on your server

Notes:

If you have a Red Hat Linux server, it is possible that you have a Blu Ray DVD drive installed. You can check with Mindware for that information. If the drive is Blu Ray, we recommend using dual layer VERBATIM Blu- Ray Media  BD-RE DL  50GB 2X for best results.

Log in as root to get to the # prompt  ->  type  edgemenu  to launch the BackupEdge software menu

Enter the letter A or use your right arrow key to highlight the Admin tab  ->  Select Initialize Medium  -> Press the Enter key once the Initialize Medium is highlighted

‘This will erase all data on this medium’ message will display  ->  Press the Enter key for ‘Erase It’

The initializing will display a message that the process has begun and once it is complete, a message will display that the process was successful. Press the Enter key to return to the menu.

Type the letter F or use your left arrow key to highlight File  ->  Select X or use your down arrow to select exit  ->  Type exit at the # prompt to return to the system login prompt