Category Archives: Red Hat Linux

Anzio Lite .bash_profile Red Hat Linux

Below is an example of what should be set up in each user’s profile in order to be able to login to TOP using multiple sessions but only one BBx license.

Login as root and enter this command:

cd /home/user_name

vi .bash_profile

Add the following code:

# Get the aliases and functions

if [ -f ~/.bashrc ]; then

. ~/.bashrc

fi

# User specific environment and startup programs

PATH=$PATH:$HOME/.local/bin:$HOME/bin

export PATH

FACETTYPE=FacetWin;export FACETTYPE

FACETWININFOSEQ=ENABLED;export FACETWININFOSEQ

printf “\034env/s anz ip\035”

read FACETWINIPADDRPC

export FACETWINIPADDRPC

cd /a/top

exec /a/top/top

exit


Red Hat Linux Samba Password

If  your operating system is Red Hat Linux and you want a user to have access to the Share, Export, etc. folders on the TOP server,  the command to change the Samba password is:

Login:  root

Password:  ask system supervisor

At the command prompt, type

#  smbpasswd  -a  username   (same login name that is used to login to TOP)

New SMB password:

Retype new SMB password:

#  exit

Red Hat Linux User Password

If  your operating system is Red Hat Linux, the command to change the user password is:

Login:  root

Password:  ask system supervisor

At the command prompt, type

#  passwd   username   (same login name that is used to login to TOP)

Change password for user username

New Password:

Retype new password:

passwd:  all authentication tokens updated successfully.

Using the WHO Command

Whether your server is running SCO Unix or Red Hat Linux, to see the user names that are logged into your system you can use the who command. Follow the simple procedure below:

Login:  root

Password: XXXXXX (ask system supervisor)

Type in who at the # prompt:

#  who

The name of each user and the number of times they are logged in will display on your screen. To return to your login prompt, type

# exit


How to Cancel User Processes

There are times when a user is working in Total Order Plus and for whatever reason finds themselves being kicked out of TOP. When this happens, there are files left open that will prohibit you from logging back in and returning to your original input.  This can also cause ‘Error 0 – File Device/Record Busy or Inaccessible’ message.

Instead of trying to track which files were open, it is easier to cancel the user processes which will allow the user to enter the same application and close any open files associated with that user.

To cancel an active user process on your system, you must enter the following commands:

Login: root
Password: xxxxxx (ask system supervisor)

Type in the who command to see what users are logged in:
# who

You can view a list of all active users with their TTY, Date and Time of login and the process they are running.

Notes:

On Red Hat Linux servers, it will also display the IP address of each user.

To view a list of all active processes:
# ps -a

You will be able to see the PID number, the TTY, Time of login and the active process for each user.

To view a list of active processes for just one specific user:

# ps -t ttyxx

The processes for each user is listed on the screen. You must decide what PID number
you want to cancel and what process to cancel for that tty. There are usually multiple
processes running for one user. The process to cancel for Total Order Plus will always
be the Business Basic process (Pro5). You will need that process identification number (PID).

With this information you can enter this command:
# kill  -9  11049 (PID number for BBx)

The system will display a prompt telling you the print job has been cancelled.

To return to the login prompt, type:
# exit

Add/Delete User in Red Hat Linux

To add a user to Red Hat Linux, you can enter a command from the # prompt. You will need the first and last name of the user and the user password. You will need to login as root.

Enter this command:

#  useradd  -c  ‘First and Last Name’  login_name

#  passwd login_name

Enter the password for this user.

To remove a user, enter this command:

#  userdel  -r  login_name

Add/Delete Printer in Red Hat Linux

To add a printer in Red Hat Linux, you can enter a command from the # prompt. You will need the print server name and the IP address to assign to the printer. You will need to login as root.

Below is an example (jd01=print device, 192.168.1.101=printer IP address):

# lpadmin  -p  jd01 -E  -v  socket://192.168.1.101  -m  raw  -D  “Printer Name/Model”

To delete a printer, you will need only the print device name. Example:

# lpadmin  -x  jd01

How To Access Your Backup Server

Customers with backup file servers need to make sure their automatic nightly backup is working properly. Weather, electrical outages or spikes, etc. can all affect the main file server and at the same time the backup server. Without checking on the situation at least once a week, there is no guarantee that you data is being transferred.

We recommend that you do a shutdown on the two file servers at least once a month. There is a certain procedure you need to use to shutdown both servers and in this order:

Shutdown the main file server and leave it at the ‘Press Any Key to Reboot’ message  ->   Shutdown the backup server,  ->  Reboot the backup server  ->  Reboot  the main server

To toggle back and forth between the two servers follow these instructions:

Press the Scroll Lock key twice  ->  Press the Up Arrow key to access the backup server login. The message SCO OpenServer Release (top2) will display on the backup server as the login prompt so you know you are on the correct server. You can login as root to do the shutdown from the # prompt.

Press the Scroll Lock key twice -> Press the Down Arrow key to return to the main server.

Note:

To see if the data on the backup server is current with the main server, you can login on the backup server and look at invoice history or the date on the Order Entry Menu.

Another way to access the backup server is to login on the main server as root. At the # prompt, enter telnet 192.168.1.3 to get to the backup server login.


Create RecoverEDGE Bootable Media

When BackupEDGE software is installed on your file server for nightly backup procedures, a bootable RecoverEdge DVD is created to be used in case a restore is ever necessary. The media contains the system configuration, printer designations, etc.

Periodically, updates are available from Microlite’s website whenever a new version of the software is released. Once an upgrade is downloaded and upgraded, you need to make a new RecoverEDGE DVD to update the information. It is a good idea to label the DVD with the date it was generated and the label ‘Bootable RecoverEdge Media’.

You receive a nightly backup summary printout. When it is necessary to make new media, you will see this message on the printout ‘RecoverEDGE Media is Out Of Date’. It only takes a few minutes to create the media compared to hours of time that would be needed to configure a new operating system.

Following are the instructions needed to create a RecoverEDGE DVD:

Insert a new DVD disc in the file server
Login to the file server as root -> Type edgemenu at the # prompt
Select Setup on the menu -> Select Make RecoverEDGE Media
Select Boot Media Type (i.e. dvd0, optical0) -> Select Make Media -> Select Continue

Medium Generation Status will display as the media is generated -> Follow the prompts on the screen

Select OK after ‘Bootable Medium Created Successfully’ message is displayed. Make sure to label the DVD ‘BackupEdge Bootable Media’ along with the date. Keep in a safe place.

Red Hat Linux Print Device Commands


There is a Linux command  lpstat  -t  that will list all of the system print devices. If there are too many lines to completely display all devices on your screen, use the command lpstat  -t  |more.

Each print device has a device name and an individual IP address for each one. Each device will show it is accepting requests and whether or not the device is idle , enabled or currently executing a print job.

TOP_PRINTER_MENU
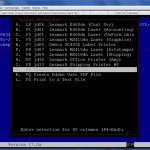
The Total Order Plus printer menu will have the print device name before the description of each printer so you can cross reference the two print device names.

Login as root and enter the system password.

#  lpstat -t |more

If a print device shows disabled, you will be able to see the device name i.e.  ps01 disabled. If there are numerous print jobs listed for the disabled print device, you will need to cancel all of them prior to executing the enable command.

# cancel  -a  ps01

# cupsenable ps01

Notes:

There are reasons why a print device might be disabled. If a user takes a printer offline during a print job, if a printer is turned off to try and cancel a print job or CUPS (Common UNIX (Linux) Printing System) will disable a printer if it doesn’t respond after a certain amount of time.

If you want to cancel an individual print job, enter this command:

# cancel ps01-1234  (1234 being the number of the print job)

If you see Network host ‘192.168.1.101’  is busy, it usually means the device is not connected to the network. You can execute the following command to test the connection:

# ping  192.168.1.101

If the device is connected, you will see the data packets that are transmitted and received.

PING 192.168.1.101: 56 data bytes
64 bytes from 192.168.1.101 (192.168.1.101): icmp_seq=0 ttl=60 time=150 ms
64 bytes from 192.168.1.101 (192.168.1.101): icmp_seq=1 ttl=60 time=101 ms

— 192.168.1.101 ping statistics —
2 packets transmitted, 2 packets received, 0% packet loss
round-trip min/avg/max = 101/125/150 ms