Monthly Archives: June 2014

How to Cancel User Processes

There are times when a user is working in Total Order Plus and for whatever reason finds themselves being kicked out of TOP. When this happens, there are files left open that will prohibit you from logging back in and returning to your original input.  This can also cause ‘Error 0 – File Device/Record Busy or Inaccessible’ message.

Instead of trying to track which files were open, it is easier to cancel the user processes which will allow the user to enter the same application and close any open files associated with that user.

To cancel an active user process on your system, you must enter the following commands:

Login: root
Password: xxxxxx (ask system supervisor)

Type in the who command to see what users are logged in:
# who

You can view a list of all active users with their TTY, Date and Time of login and the process they are running.

Notes:

On Red Hat Linux servers, it will also display the IP address of each user.

To view a list of all active processes:
# ps -a

You will be able to see the PID number, the TTY, Time of login and the active process for each user.

To view a list of active processes for just one specific user:

# ps -t ttyxx

The processes for each user is listed on the screen. You must decide what PID number
you want to cancel and what process to cancel for that tty. There are usually multiple
processes running for one user. The process to cancel for Total Order Plus will always
be the Business Basic process (Pro5). You will need that process identification number (PID).

With this information you can enter this command:
# kill  -9  11049 (PID number for BBx)

The system will display a prompt telling you the print job has been cancelled.

To return to the login prompt, type:
# exit

Sonicwall Firmware Update

Install SonicWall FIrmware Upgrade Download Firmware Upgrade From SonicWall

  1. Open your internet browser
  2. Enter www.mysonicwall.com
  3. Enter customer username and password
  4. Select Submit
  5. Select Download Center
  6. Select Software Type (example, TZ 100 Firmware)
  7. Click on download file description (example, TZ 100 Firmware) under Firmware sub heading
  8. Select Save for Do You Want To Save This File (if Chrome select file at bottom and select Show In Folder) ?
  9. Select location to save file (example, C:\TEMP)
  10. Select Save
  11. Wait for download to complete
  12. Select Close
  13. Select Logout

Note: Once you download file you can use the same file to upgrade other SonicWall units that are the same model. Backup Settings

  1. Open your internet browser
  2. Enter Sonicwall IP address (example, 192.168.1.1)
  3. Enter admin for name
  4. Enter password (example, superXXX, where XXX is customer code in caps)
  5. Select System on left side of screen
  6. Under System select Settings
  7. Select Create Backup Settings

Export Settings

  1. Open your internet browser
  2. Enter Sonicwall IP address (example, 192.168.1.1)
  3. Enter admin for name
  4. Enter password (example, superXXX, where XXX is customer code in caps)
  5. Select System on left side of screen
  6. Under System select Settings
  7. Select Export Settings
  8. Select Export (Default name of the file will be ‘sonicwall.exp’ message will display)
  9. Save to folder.

Install Firmware Upgrade

  1. Open your internet browser
  2. Enter Sonicwall IP address (example, 192.168.1.1)
  3. Enter admin for name
  4. Enter password (example, superXXX, where XXX is customer code in caps)
  5. Select System on left side of screen
  6. Under System select Settings
  7. Select Upload New Firmware button
  8. Select Choose File
  9. Select folder for firmware upgrade file (example, C:\TEMP)
  10. Select downloaded file name from list box (example, sw_tz150w_s_eng_3.1.6.6.sig)
  11. Select Open
  12. Select Upload
  13. Status will display Please wait…
  14. When completed status will display Firmware uploaded successfully
  15. Select Icon under Boot column for Uploaded Firmware – New!
  16. Select Ok for install message
  17. Status will display Please wait…
  18. Sonicwall will automatically restart

Rebuild Inventory Item Committed Quantites

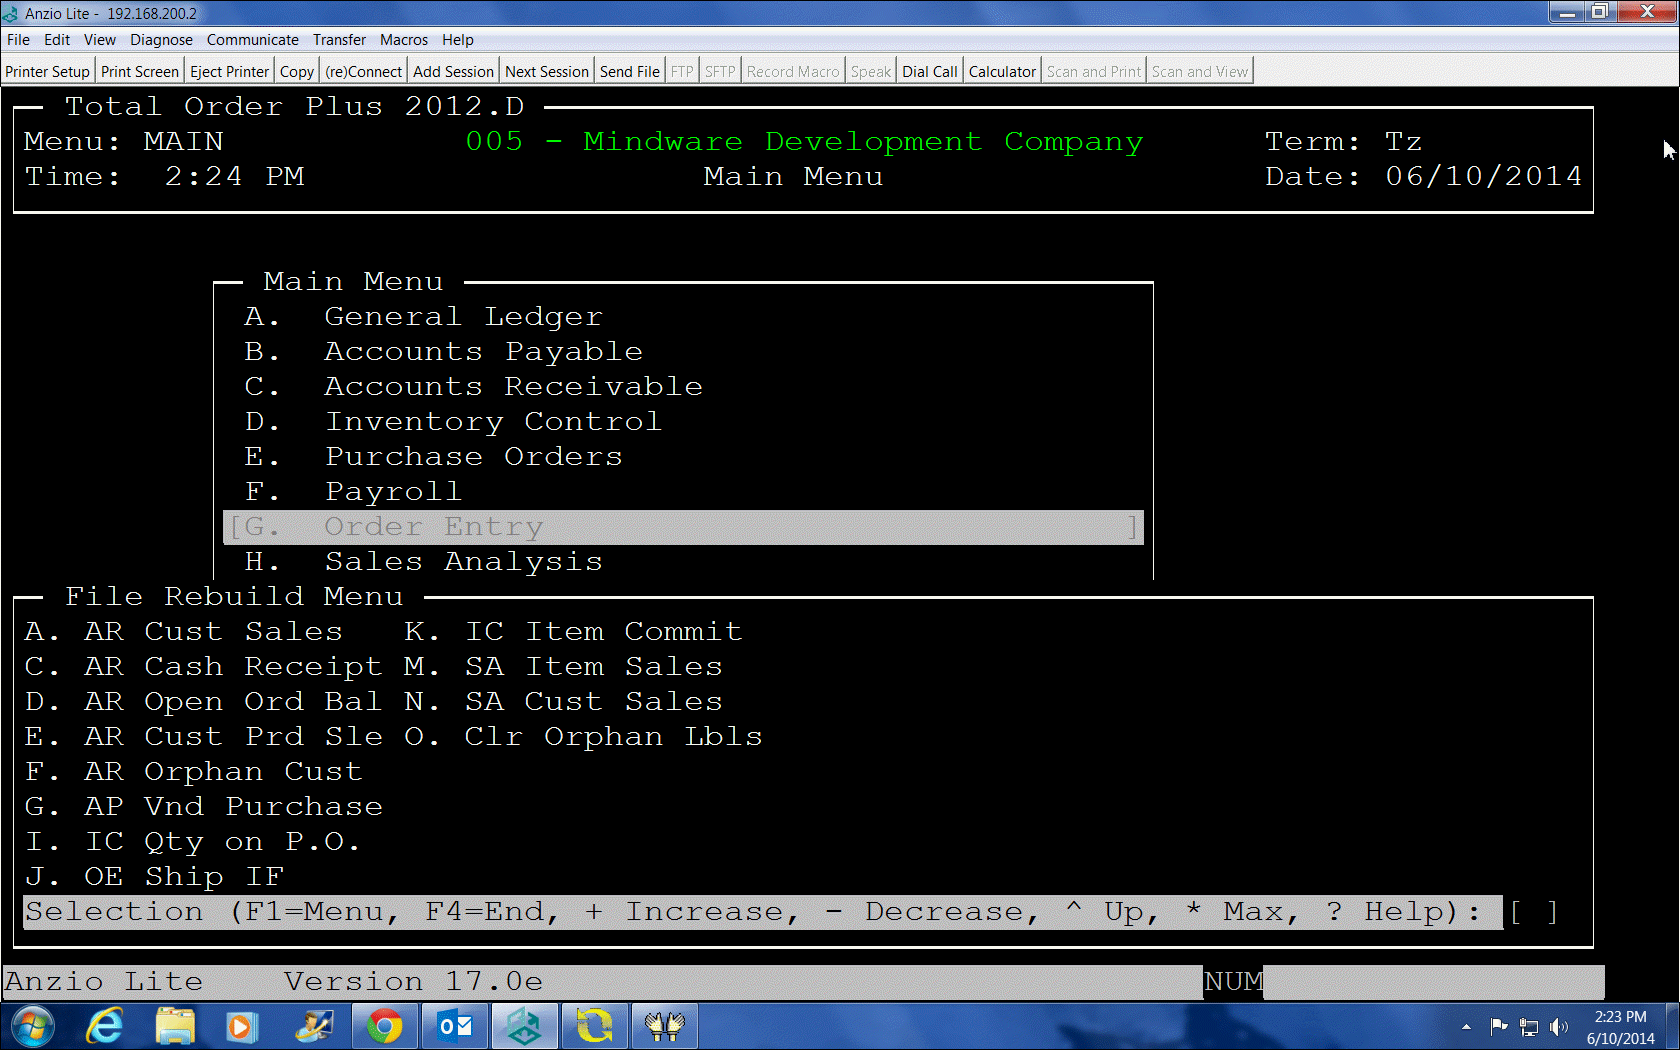
The Rebuild Options Menu provides utility programs that are necessary to reconstruct data files under certain conditions. One of those conditions would be when you need to delete inventory items that show a zero ending balance but you are unable to because there are quantities displayed in the Quantity on PO, Order Committed or the Invoice Committed fields in the Item Balance & Sales Display on the Inventory Item Master Sub-Menu.

If an inventory item shows a balance in any of the committed fields, you would need to check the Item Order/Invoice Display and the Item Purchase Order Display to get the order or invoice number or the purchase order number. You can delete the open orders, invoices or purchase orders for the items you are wanting to delete. If the display does not show any open orders, invoices or purchase orders but does show a committed balance, you will need to run the utility programs to remove the outstanding balances.

To run the utility programs, go to the TOP Main Menu and type a ? and enter RB to access the Rebuild Utility Menu. You would select I. IC Qty on P.O. and K. IC Item Committed. Once you have completed the rebuild programs, you will be able to delete the inventory items.

Notes:

You may want to run these programs periodically just to keep the committed quantities ‘in sync’. It will require all users to be out of Total Order Plus or at least at the TOP Main Menu.

rebuild_qty


Set Module Date in Total Order Plus

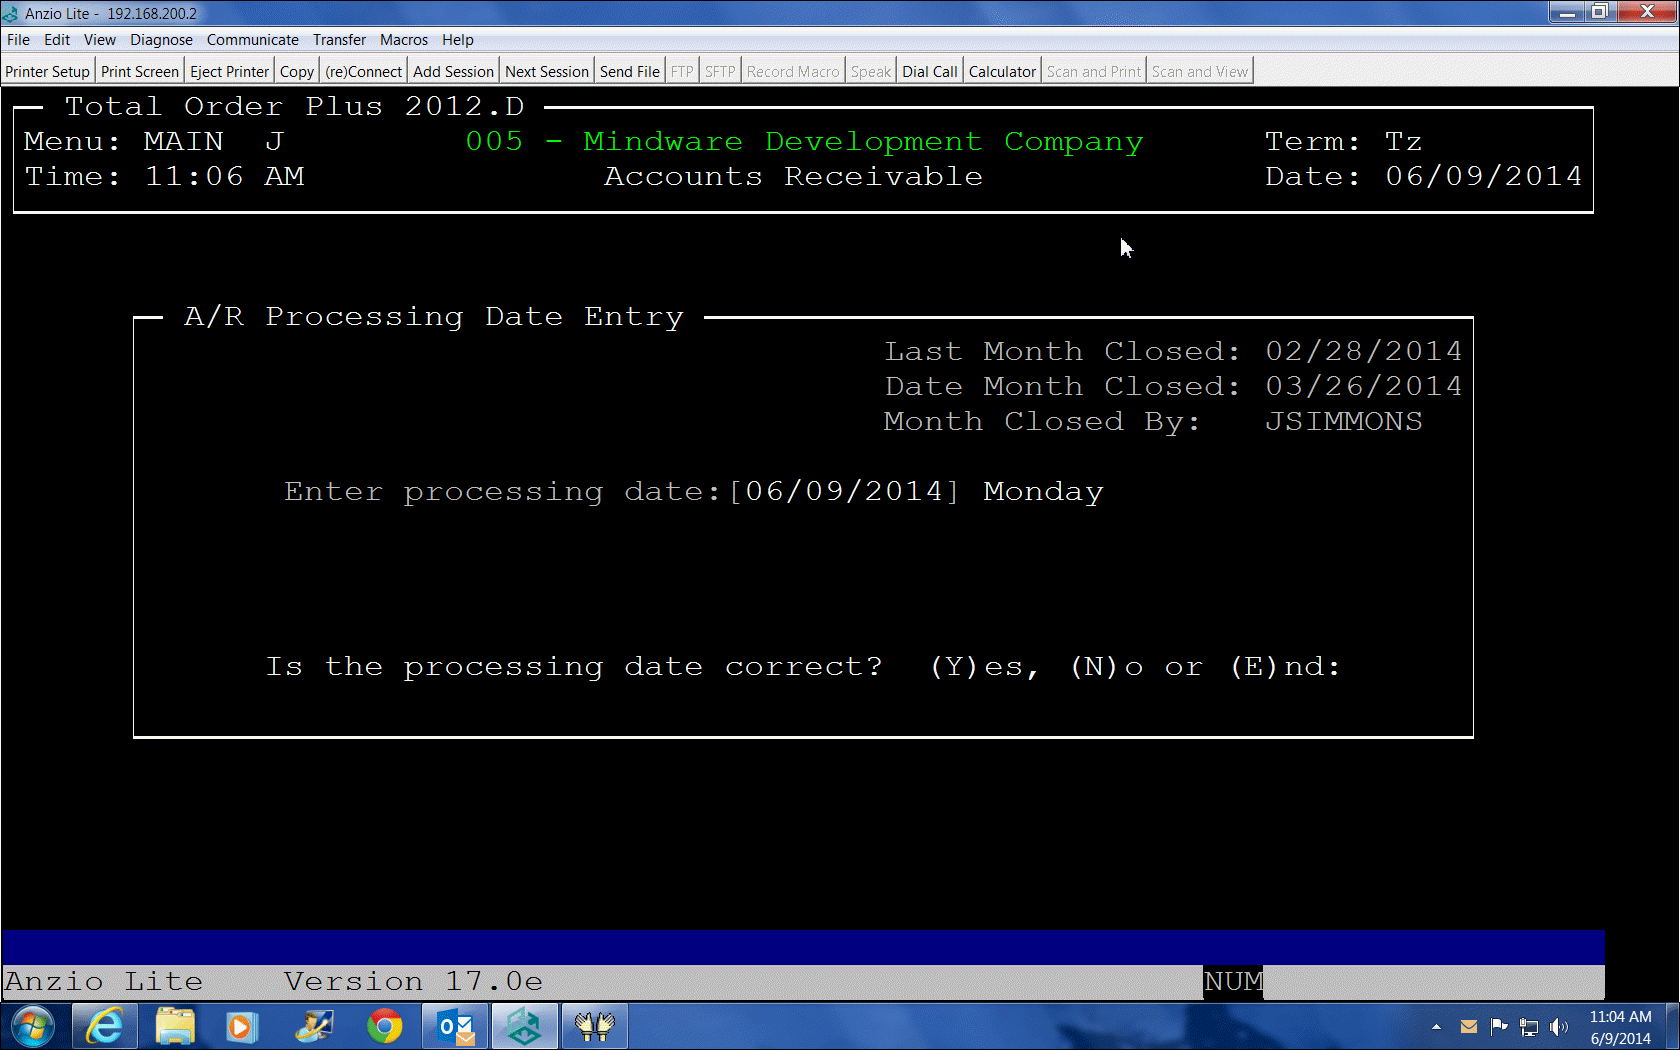
There are two types of dates used with each module in Total Order Plus, the current system date and the application date. The current system date is displayed at the top of the TOP Main Menu. The application date is the date that displays at the top of each TOP Main Menu in each module.

The application date is set for each module from any menu within the module by pressing the F5 key. Each module has its own application date. This date is used to post entries to the General Ledger, allowing postings to prior or future periods in one module without affecting other modules. The application date is used for the order and invoice date, statement date, purchase order date, etc. for each module.

The application date does not get changed automatically by the system and the user is responsible for maintaining the appropriate posting date. Below is the screen image you will see when you press F5 in any TOP module:

date_change


Backup DVD/Tape Rotation Requirements

Customers usually have backup software that allows them to backup their data stored on their server. BackupEdge software allows the user to set up a schedule of what days they want to perform a backup, either to DVD or to a tape cartridge.

The elusive rule of thumb is there should be a DVD or tape for each night of the week Monday through Friday in their rotation. Some customers prefer to have a two week rotation. BackupEdge requires that the DVD or tape not to be used until at least 7 days from the last time it was used in a backup routine. For example, if you use a DVD or tape on Monday, you cannot reuse the DVD or tape until Monday of the next week.

It may not be a bad idea to keep a backup from the last day of each month until the next month end is completed.

A recommended rotation would be:

Monday Week 1, Tuesday Week 1, Wednesday Week 1, Thursday Week 1, Friday Week 1

Monday Week 2, Tuesday Week 2, Wednesday Week 2, Thursday Week 2, Friday Week 2

Month 1, Month 2, Month 3

Year 1

Remote FTP backups do not require the same rules of use.