The sales tax code has been expanded from 2 to 6 characters. The code was expanded to help deal with states that have a large number of tax jurisdictions. The change also allows the use of zip codes as the sales tax code.
Author Archives: Archie Tucker
MSRP Added To Item Master
A field for MSRP (Manufacturer’s Suggested Retail Price) has been added to the item masterfile maintenance. The new field is located above the List Price. The new field will be used for additional features in future versions of TOP.
User Last Login Display
The user last login date is now displayed on the User Master Maintenance display. Below is an example:

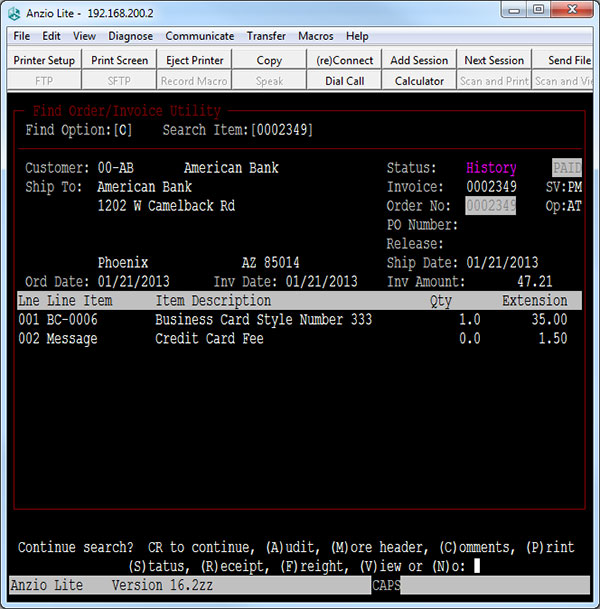
Order Shipment Info Display
The Find Order/Invoice Utility is used to display order shipment information. The utility is located on the Order Entry System Menu. Once an order is found, there are multiple search options, select the Freight option (see example below):
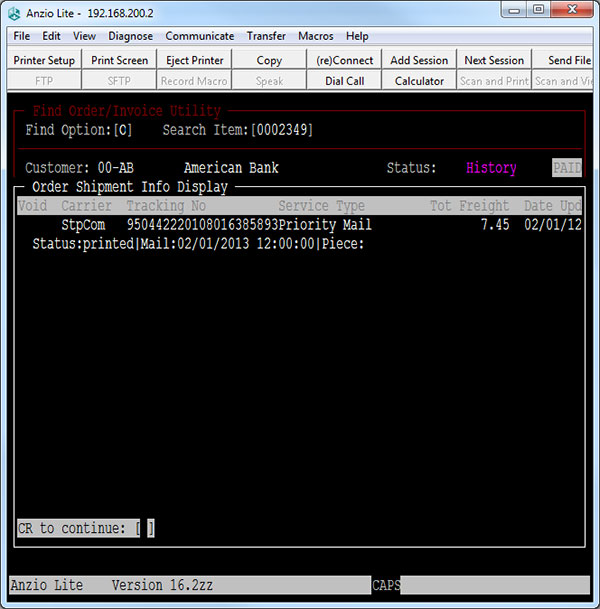
After you select the Freight option, you will get a screen like the example below:
Stamps.com TOP Interface
Before setting up Stamps.com to interface with TOP, you should first setup the items below.
Setup TOP Integration
TOP Ship Via Code
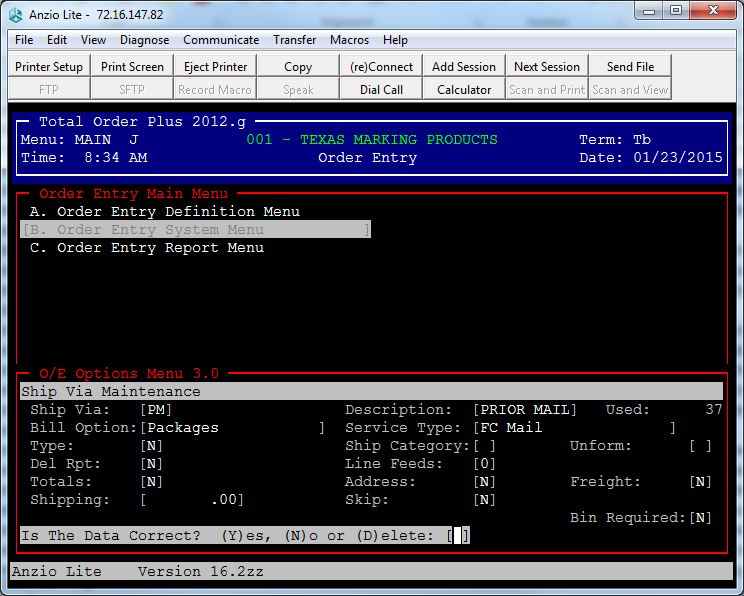
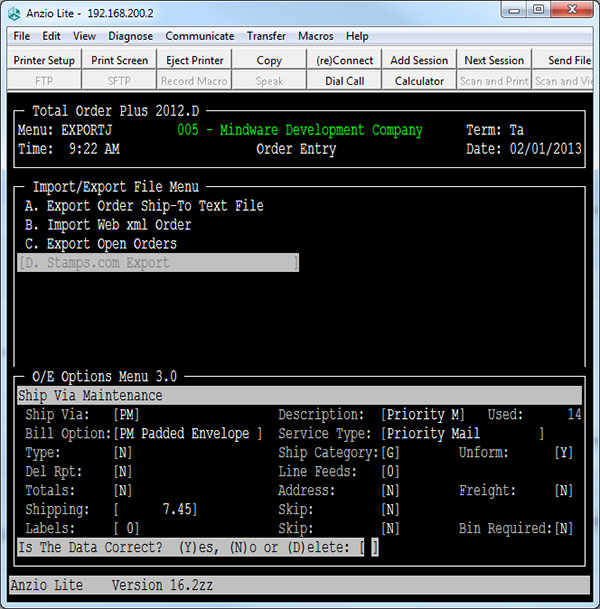
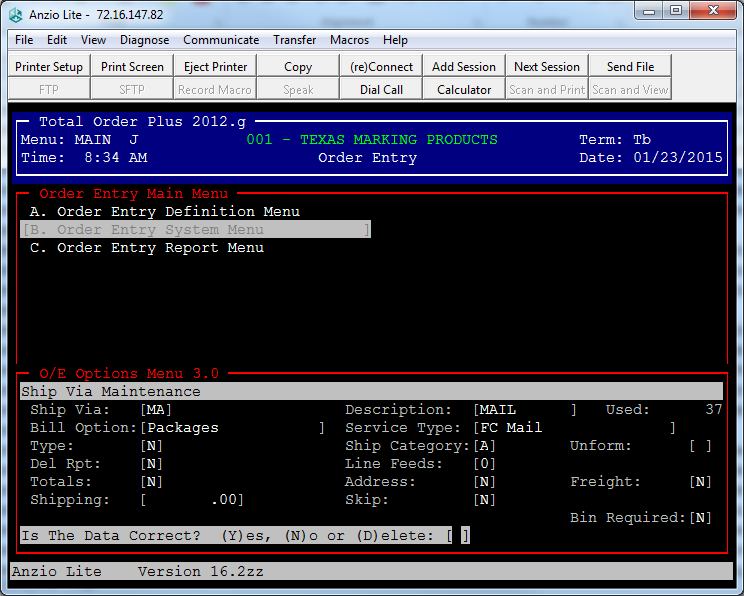
To setup TOP integration only requires setting up two additional ship via parameters. The Ship Via Maintenance can be found on the O/E Options Menu.
PM – Priority Mail Bill Option: Packages Service Type: FC Mail
MA – Mail Bill Option: Packages Service Type: FC Mail
Map V Drive on Shipping PC
To transfer data between the server and the shipping, you will need to Map the V drive on PC to \\192.168.1.2\TOP_IMPORT. For how to map a drive select this link.
Stamps.com Export
Run Stamps.com Export from the TOP O/E Import/Export File Menu to create the STAMPS_COM.csv file. This will be needed before continuing to the steps below.
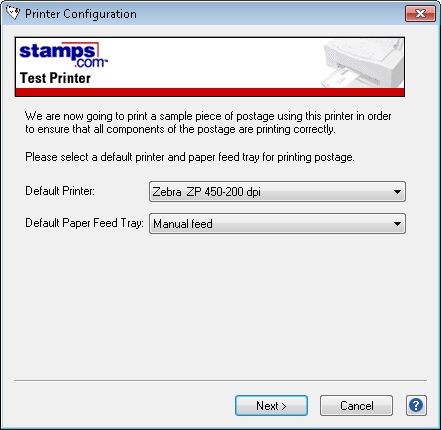
- Start Stamps.com if not running
- Select <Manage Profile> from profile pull-down menu
- Select New button
- Select CSV/TextFile (*.csv or *.txt)
- Select Next
- Enter TOP_SC001 for Profile Name (001 is for company 1 in TOP)
- Select Next
- Select Create a new data source
- Select Next
- Select Text/CSV File
- Select Next
- Enter V:\CO001\SC for Location
- Select Next
- Select Test Connection -> Select OK
- Select Next for Confirm Connection
- Select STAMPS_COM.csv for Database Table
- Select Auto Match button
- Select OK for Auto Matching Done
This should map the following fields:
Package Tab:
- Order ID: ORDER_NUMBER
- Order Date: ORDER_DATE
- Package Value: PACKAGE_VALUE
Shipping Options Tab:
- Mailpiece: MAIL_PIECE
- Mail Class: MAIL_CLASS
- Printed Message: PRINT_MESSAGE
Recipient Tab:
- Full Name: FULL_NAME
- Company: SHIPTO_COMPANY
- Address 1: SHIPTO_ADDRESS1
- Address 2: SHIPTO_ADDRESS2
- City: SHIPTO_CITY
- State: SHIPTO_STATE
- ZIP/Postal Code: SHIPTO_ZIP
- Country: SHIPTO_COUNTRY
- Email: SHIPTO_EMAIL
Return Address:
- Company: RETURN_COMPANY
- Address 1: RETURN_ADDRESS1
- Address 2: RETURN_ADDRESS2
- City: RETURN_CITY
- State: RETURN_STATE
- ZIP/Postal Code: RETURN_ZIP
Second Step From Stamps.com
- Select Shipping Options Tab
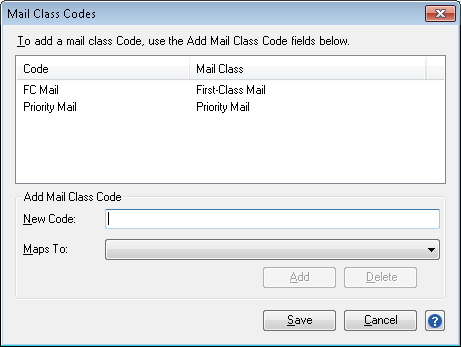
- Select Mailpiece button (Import and PostBack use the same table for Mailpiece)
- Select Maps To pull down menu
- Select an option (like Package)
- Enter the TOP Ship Via Service Type (example Priority Mail) in the New Code field
- Select Add
- Select Save after entering Mailpiece codes
- Select Mail Class button (Import and PostBack use the same table for Mail Class)
- Select Maps To pull down menu
- Select an option (like Priority Mail and First Class Mail)
- Enter the TOP Ship Via Service Type (example Priority Mail and FC Mail) in the New Code field
- Select Add
- Select Save after entering Mail Class codes
- Select Next
- Select Same data source
- Select Next
- Map the field like below for Postback Data

Package Tab:
- Order ID: ORDER_NUMBER
- Mail Piece: POSTBACK_MAIL_PIECE
- Mail Class: POSTBACK_MAIL_CLASS
- Mail Date: POSTBACK_MAIL_DATE
- Postage Amount: POSTBACK_TOTAL_COST
- Status: POSTBACK_STAT
Third Step From Stamps.com
- Select Mailpiece button
- Select Maps To pull down menu
- Select an option (like Packages)
- Enter the description to display in TOP (example Packages) in the New Code field
- Select Add
- Select Save after entering Mailpiece codes
- Select Mail Class button
- Select Maps To pull down menu
- Select an option (like Priority Mail)
- Enter the description to display in TOP (example Priority Mail) in the New Code field
- Select Add
- Select Save after entering Mail Class codes
- Select Next
- Select Done
- Select Done
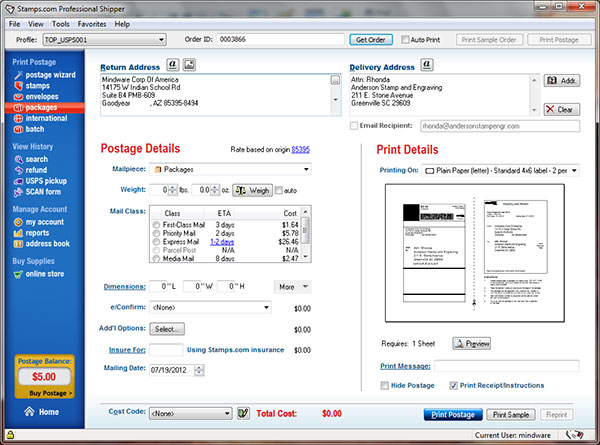
To use interface select TOP_SC001 profile, then enter TOP order number for Order ID field and select Get Order. Below is a screen example from Stamps.com after selecting Get Order.
Notes:
- The Stamps.com Export must be run before new orders/invoices can be pulled up in Stamps.com.
- When the Stamps.com Export is run, it also checks for Stamps.com shipped orders and uses that information to also update TOP.
- The Find Order/Invoice Utility is used to display shipping information. For more info on displaying the order shipping info select this link.
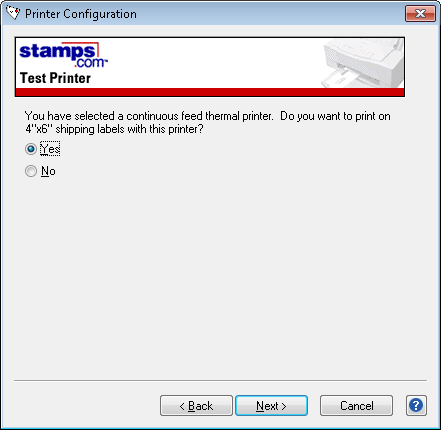
You can add a printer for the labels. See example below:
Expanded Credit Card Functionally
Additional fields have been added to the credit card function to help make interfacing with credit card merchants easier. Below is the new A/R Customer Card Maintenance screen. For information on limiting access, see Credit Card Access.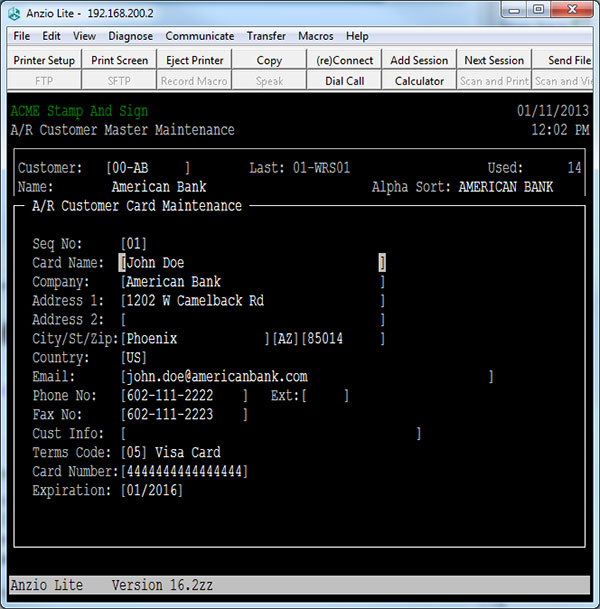
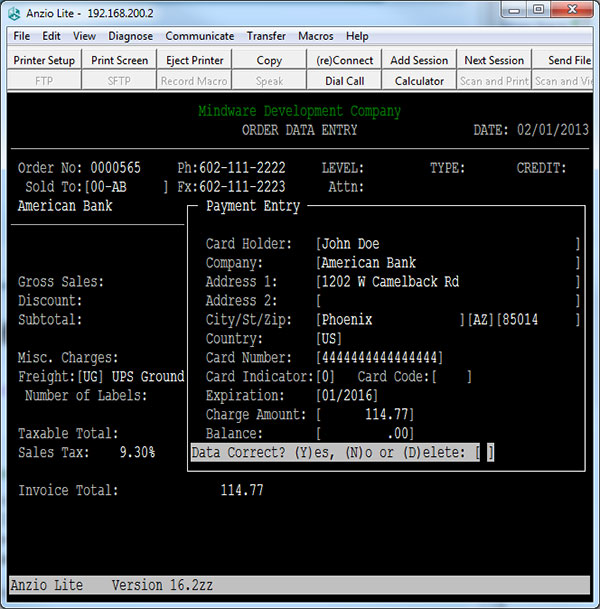
Below is the new Order Entry Payment Entry screen.
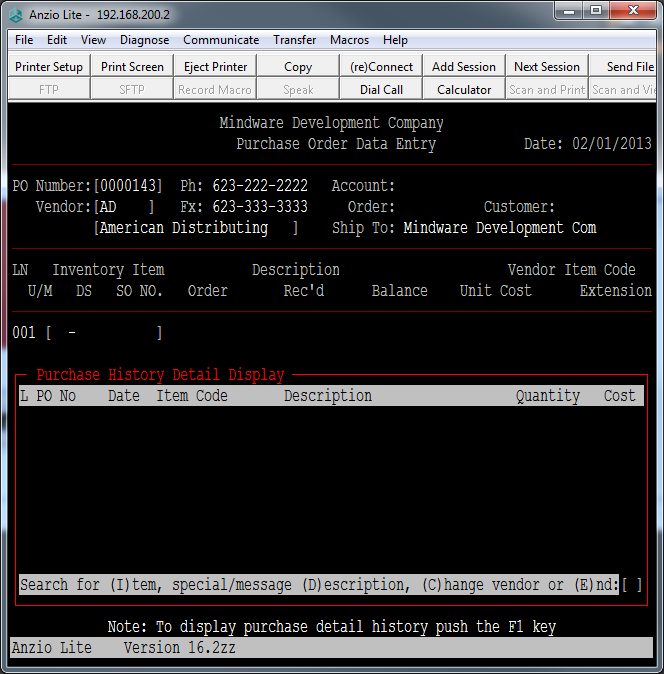
Change Vendor From PO History Detail
While entering a PO, you can insert items purchased from other vendors into a new purchase order. This can be useful when multiple vendors carry the same item or when one vendor purchases another vendor.
The option is available from the Purchase History Detail Display (see below). This screen is accessed from the PO Detail Item Code entry after pushing the F1 key for history detail and selecting the Change Vendor option.
Verizon FiOS Setup
Verizon FiOS is a bundled Internet access, telephone and television service that operates over a fiber-optic communications network. If you are not using the television service, you can bypass the Verizon modem/router and connect your SonicWall WAN port directly to the cable that was connected to the WAN port on the Verizon modem. The SonicWall will need to be setup for DHCP if your Verizon FiOS is setup with a dynamic IP address. After you connect the SonicWall, you will need to have Verizon reset the line. If you require the Verizon modem/router, it will need to setup in bridge mode.
Mapping Network Drives For TOP
Below are the mapped network drive settings used with Linux and Unix. A valid Linux/Unix user/password must be used to map a drive to the Windows PC. The Windows PC will use the Windows user/password as the default.
- Drive Letter: R Path: \\192.168.1.2\top (Used for UPS Worldship and FedEx Interface)
- Drive Letter: S Path: \\192.168.1.2\share
- Drive Letter: T Path: \\192.168.1.2\top_text
- Drive Letter: U Path: \\192.168.1.2\top_export
- Drive Letter: V Path: \\192.168.1.2\top_import
- Drive Letter: W Path: \\192.168.1.2\top_remote
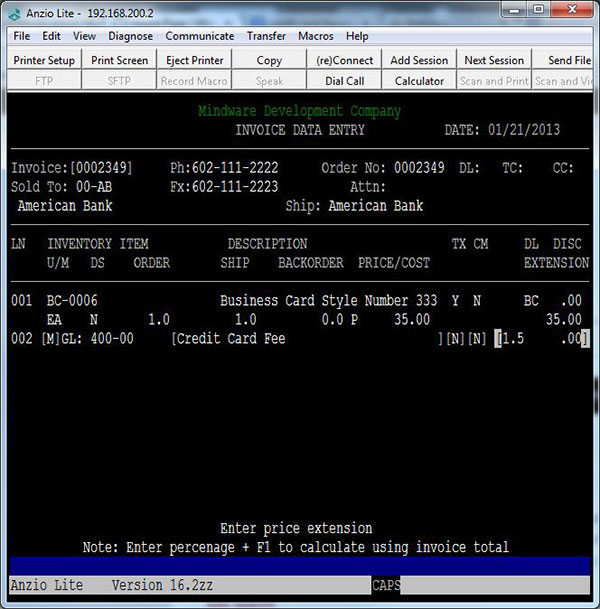
How To Add A Credit Card Fee
Beginning on January 27, 2013, retailers have an option to tack on a surcharge if a customer uses a credit card (limited to 1.5% to 4% of total purchase). Please note, that 10 states do not allow this fee. The 10 states are listed below. The fee doesn’t apply to debit card purchases.
- California
- Colorado
- Connecticut
- Florida
- Kansas
- Maine
- Massachusetts
- New York
- Oklahoma
- Texas
To add this fee to a TOP invoice in Order Entry, you should first setup a Miscellaneous Code for credit card fees. Miscellaneous codes can be added from the O/E Options Menu. Below is an screen example for adding a miscellaneous code for credit card fees.
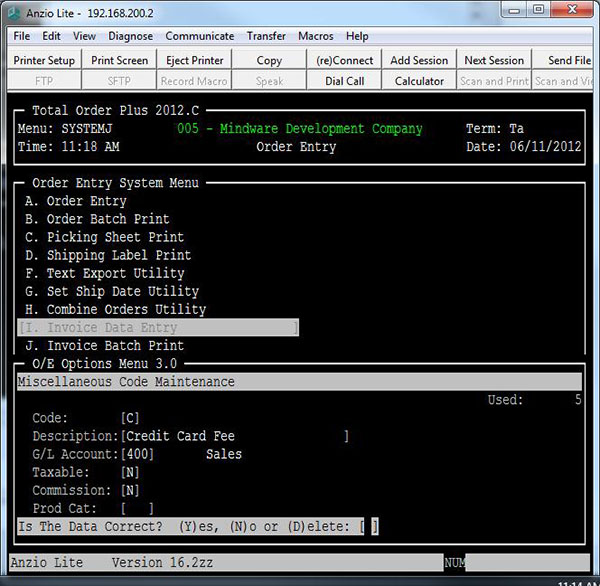
Miscellaneous Code Maintenance
After adding the miscellaneous code, you can use it during order or invoice entry. Just enter MC for the item code (the MC is for Miscellaneous Code), then enter the percentage + the F1 key. See example below.