Category Archives: TOP Accounts Payable

Accounts Payable Invoice Credit Card Option

On the Accounts Payable Options Menu, there is a selection ‘Terms Code Maintenance’. You can enter credit card terms codes to be used in the Vendor Master and in Invoice Data Entry. You can override the terms code in Invoice Data Entry if their regular terms code is not a credit card. Once the invoices are updated, they will display on the Vendor Open Invoice Display.

You may have multiple credit card terms codes –  i.e. AX American Express, MC Master Card, VI Visa, etc.  When you enter an invoice for a vendor that you want to pay with a credit card, you need to make sure the terms code is correct on the invoice. It is always a good idea to enter a memo to show ‘Paid by Credit Card’ so it displays in invoice history.

On the Account Payable Options Menu, select Terms Code Maintenance. Enter a two character credit code (VI=Visa, MC=Mastercard, etc.) and a 30 character terms code description. Enter a payment type (0-cash, 1-check or 2-credit card). Enter a vendor code from the Vendor Masterfile or type a ? to display the Vendor Code Selection Menu. You will be prompted to enter the number of due days (# of days until invoice is due), # of days until the invoice will be due for payment, # of days for the discount to be applied and the discount percent.

When the invoice is updated, the invoice will display on the vendor account in A/P Open Invoice Display with a zero balance. In the A/P Invoice History Display, instead of a check number, it will display the name of the credit card used for payment – i.e. Visa, MC, etc. The result of the transaction will post to the General Ledger End of Day.

Accounts Payable Invoice, Check History Purge

Total Order Plus accumulates important invoice data into multiple history files on a daily basis. The files are of a dynamic, multi-keyed structure, which means they continue to increase in size and should be purged on some kind of a time table. In the Business Basis language, there is a maximum file size limit. If a file reaches the maximum, you will not be able to access the file or to down size it to it’s current size. As the file capacity increases, the size of the hard drive decreases as well.

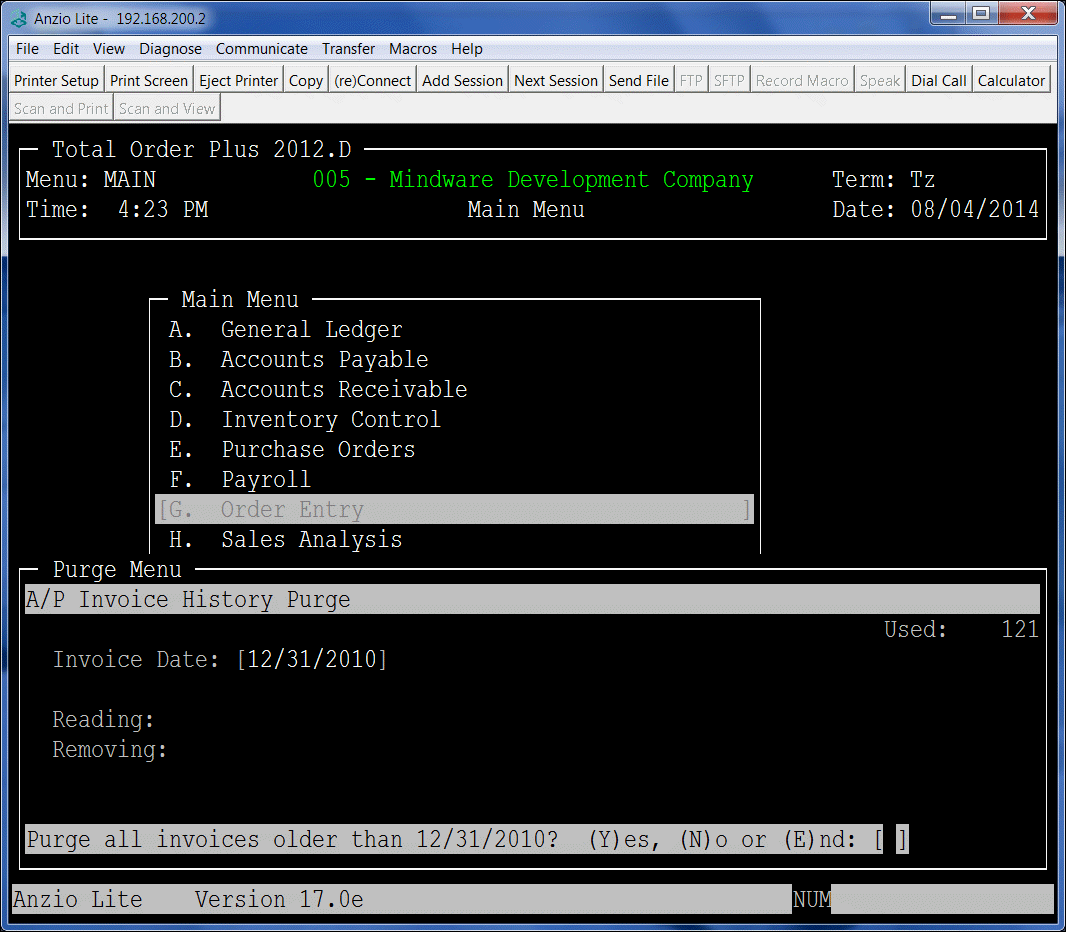
The Accounts Payable History Purge programs are located on the PM Options Menu. To access the purge programs, type ?PM at the TOP Main Menu and Select D. A/P Inv History or E. A/P Chk History. You will be asked for an ending date to purge. All invoices and checks older than the date entered will be purged.

The Accounts Payable Invoice and Check History display programs are on the Accounts Payable Options Menu. There are also hardcopy print programs on the Accounts Payable Report Menu.

Accounts_Payable_purge


Accounts Payable Check Reconciliation

To activate this feature, you have to answer yes to Check Reconciliation in the Accounts Payable Parameters on the Accounts Payable Definition Menu. Then select File Creation and Information  to create the check reconciliation file.

Check Reconciliation matches the bank balance in your General Ledger with the balances on your monthly bank statement. Before starting this procedure, you should examine your bank statement and note which checks are outstanding. Do the same with deposit slips. Note any adjustments to your bank balance such as returned check charges, service charges, etc.

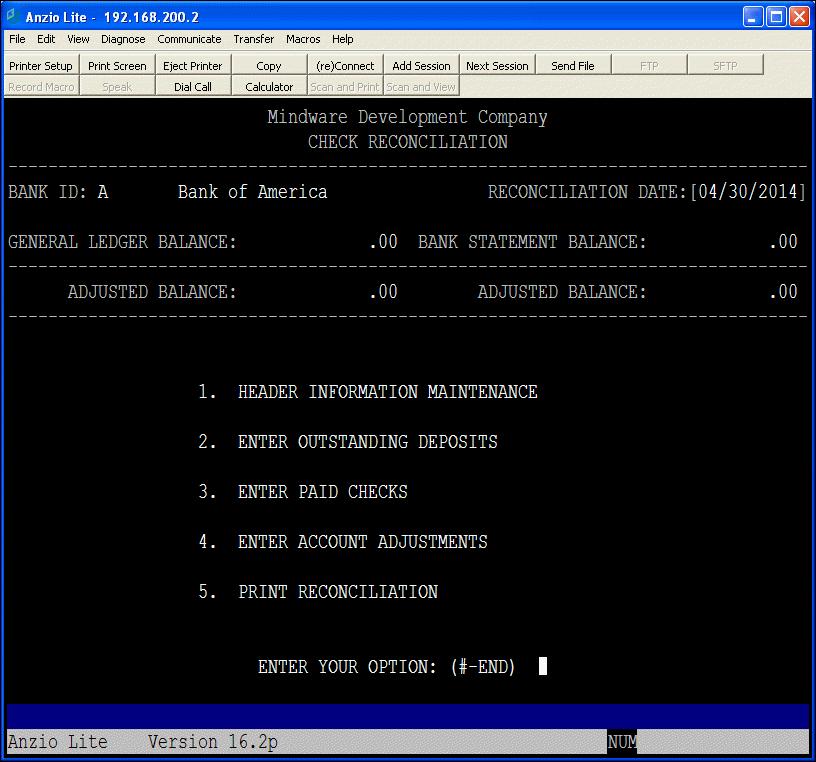
At the end of each month, you will select Check Reconciliation on the Accounts Payable System Menu. Enter the Bank ID, Month-End date, General Ledger balance and the Bank Balance. Then you will proceed with entering outstanding deposits, paid checks that have cleared the bank and any account adjustments. Once all of the information is entered, you may print out the reconciliation report. The processing steps are listed below in this screen display.

 AP_CHECK_REC

TOP Contacts

Two_CentsMy Two Cents, by Archie Tucker


Are you getting the most out of your contact information? Each customer and vendor can have up to 99 contacts. Besides the obvious uses, this information can be used for emailing, sending UPS tracking information and updating contacts on other systems. Updating contacts on other systems is what we will be covering in this post.  Examples of other systems would be:

  • PC
  • Smartphone
  • Tablet
  • Google Plus
  • Web Based Newsletter

To export customer contacts, use the Export Contacts for Outlook on the A/R Import/Export File Menu. For vendor contacts, use the Export Contacts for Outlook on the A/P Import/Export File Menu. Both programs have numerous options for exporting. A new file format, vCard (format for electronic business cards) has just been added to both contact exports.

UnForm Parameter Maintenance

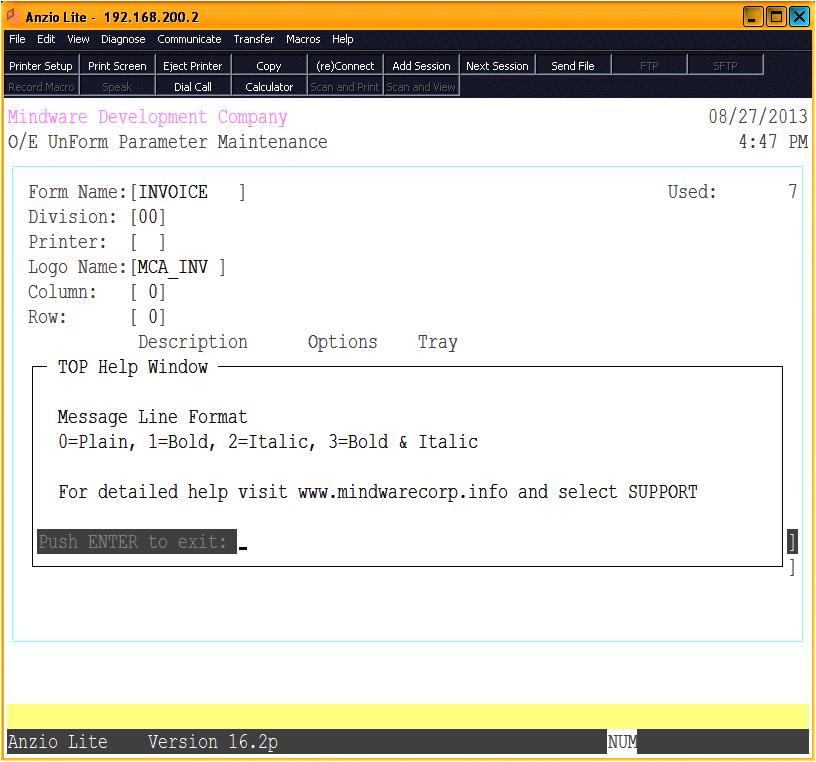
The Accounts Payable, Accounts Receivable, Purchase Order and Order Entry modules each have an UnForm Parameter Maintenance program on each of the above mentioned Definition Menus. You are able to set up parameters for each form you want printed in TOP:  checks, statements, purchase orders, orders, invoices and quotes.

Forms names to be used are displayed at the bottom of your screen: CHECK, PO, STATEMENT, ORDER, INVOICE and QUOTE. You can set up a maintenance screen for each division of your company, if applicable, and assign a specific printer for each form.

You can have a custom logo file made with your company information and assign column and line print positions of where you want the logo to print on each form.

You can have up to four copy descriptions, pricing or no pricing, screening or no screening and designate which paper tray on each printer.

You can enter up to two message lines and select either plain, bold or italic or a combination for the message lines format.

Notes:

To view the TOP Help Menu, you can press CTRL+Y at each input field to view the help options.

UNFORM_PARAM

Reverse A/P Computer Generated Checks

Check reversals are made using Manual Check Data Entry on the Invoice and Manual Check Menu. When a reversal is made, all of the invoices that were paid by the original check will be written back to the vendor file as an open invoice.

Enter the check number you want to reverse. The vendor number and name, check date and amount displays on the screen.

Notes:

The system automatically inserts R after the check number designating a reversal.

Is This A Check Reversal? (Y-N) -> Type Y to accept the check information
Is The Heading Information Correct? (Y-N-DELETE)
Type Y to continue with the check reversal
Type N and a message ‘Check Reversals Cannot Be Edited’
Type DELETE or Press F7 to remove the check information

You will be prompted to enter the invoice number(s) that were paid
with this check. The invoice amount and the General Ledger distribution will display on the screen. Accept the information to complete the entry.

Print the Manual Check Register to update the check reversal
information to the vendor and history files.

Adjust A/P Open Invoice

The Open Invoice Data Entry selection on the Accounts Payable Invoice and Manual Check Menu can be used to adjust invoice dates and make adjustments to invoice amounts.

Enter the vendor code or ? to insert the vendor from the display window
Enter the invoice number or ? to insert the invoice number from the display window
‘Is This An Invoice Adjustment?’ (Y)es or (N)o? -> Press Y to continue

Notes:

The invoice dates, terms, purchase order number, memo and invoice amounts displays on your screen.

‘Is The Data Correct?’ (Y)es or (N)o?

Type N to edit the invoice amount -> Enter the amount of the adjustment

Notes:

You can adjust the entire amount or a partial amount. The
amount must be a negative amount. If you are adjusting a credit
invoice, the amount would be positive.

The General Ledger distribution will display on the bottom of your
screen.
Press Enter to accept the line number assigned by the system
Press Enter to accept the expense account(s) displayed that was on the original invoice.

Notes:

Multiple General Ledger account numbers can be distributed.
For example, you may want to adjust only the amount of freight.

Run the Invoice Data Entry Register and Update to complete the process.