Author Archives: Joanne Simmons

Microsoft’s Security Essentials AntiVirus Installation

Microsoft has released their own antivirus software called Security Essentials or MSE. The nice thing about it is ‘it’s free’! It is designed primarily for smaller businesses (8-10 users) and can be installed with ease.

Please be aware that MSE cannot be installed on any Windows version except Windows XP SP2 or SP3, Windows Vista or Windows 7. If you have Windows 8 installed, you will need to read the information in the link below:

http://answers.microsoft.com/en-us/protect/forum/mse-protect_start/can-i-use-microsoft-security-essentials-with/34b26e6f-12a0-4bc7-b160-f3b2ff70b910

Notes:

If you allow the McAfee AntiVirus to expire before installing Microsoft AV, you don’t have to do Step 1.

For customers using McAfee Antivirus on your Sonicwall, follow these instructions to get the IP address of your PC:

1.  Click on Start  –>  Programs  –>  Accessories  –>  Command Prompt

Type the command  ipconfig to display your PC’s IP address  –>  This IP address will have to be excluded on the Sonicwall under Security Services –>  Client Antivirus  –>  Configure. Call Mindware if you need help with the exclusion.

2.  You will need to remove the McAfee Anti Virus on each PC.

Click on Start  –>  Settings  –>  Control Panel  –>  Add/Remove Programs

Highlight McAfee Virus Protection  –>  Click Remove

Now you are ready to install the new antivirus software. Log on to www.microsoft.com/security_essentials and click on Support before doing the dowload. There are videos that explains how to download the software, how to do an on demand scan and how to fix a threat when one is detected.

Once you click on the Download Now button, follow the prompts on your screen. If you are using Internet Explorer, a bar will display on your screen – click on the bar to continue. If you are using another browser, you will be asked what version of Windows you are using and then follow the prompts on your screen. The installation will make sure your PC passes all requirements for the installation.

horizontal rule

Things You May Not Know About TOP

Editing Customer Name/Address on Open Orders/Invoices

TechLine

The Tech Line, by Joanne Simmons


Question:

When a customer calls with a change of address, it is time consuming to have to go into every order and invoice and edit the bill-to address. Has this been addressed in the new version of TOP2012?

Answer:

You would go into the customer master and edit the customer name and address. Upon exiting the Customer Status Maintenance screen, you will be prompted with ‘Change O/E order and invoice customer name and address also? (Y)es or (N)o:’. You need to answer yes to have TOP change the bill-to name and address on all open orders and invoices for that customer.

If you answer no, you would have to manually change the bill-to address on each individual order and invoice. TOP now allows you to press F2 at the ship-to name field to access the contact name and F2 again to access the bill-to name and address. You will notice that a third address line has been added to both the bill-to and ship-to address and the customer master address. Each line is now 35 characters in length.

TOP Credit Card Processing

Total Order Plus 2012 creates a text file during the Order Entry daily closing procedure that contains the information for each credit card transaction on each invoice that was paid with a credit card. The information contains the amount of the transaction, credit card number, the month and year of the credit card expiration date, customer code, customer name, address, city, state and zip code.

The file name is created using CC+year+month+day with an extension of .csv. The file is created in the U Drive on the file server (EXPORT drive) in the CO001/CREDIT_CARD folder. You can activate Excel and import the file that can be used to balance your daily credit card transactions. Other programs like NotePad, Word, etc. can be used to view the file. This file can be transferred to your credit card software company. Contact your vendor to see how they want the file transmitted to them.

Anyone interested in making this feature available on your system, please contact Mindware to set the status flag and activate.

Notes:

You must make sure you have your PC is mapped to the EXPORT drive in order to retrieve the files.


Send Invitation From LogMeIn

To activate remote access on www.LogMeIn.com, you will need to set up a new account with a user name and password. Once you log in to your account, you will have the option to download LogMeIn software to your PC.

After the download is complete, a LogMeIn icon is displayed in the task bar on your desktop. Click on the icon and enable LogMeIn. You will see an option to Turn Off accessibility to your PC, Send an Invitation or to Share Files.

In order for a remote user to have access to your PC, you would click on Send an Invitation. The name of the invitation displays in the Title field and there is an option to set an expiration date for the invitation in days, hours and minutes. Click on Next -> Check ‘I will send the message myself’.

Click on Next and LogMeIn will create an invitation link. You can select to Copy the link to your clipboard or Create a new email to the remote user. If you select the clipboard option, you will need to create a new email to the remote user and insert the link in the body of the email from the Clipboard. If you selected to create a new email to a remote user, the link is automatically inserted into a newly created email, the subject of the email will display ‘Desktop Sharing link via LogMeIn.com’ and the link will display in the body of the email. Click on Send to transmit the invitation to the remote user.

Notes:

It is important that you set the expiration date to a reasonable amount of time so the invitation doesn’t expire before the remote user is logged off your PC. A specific amount of hours or days would be appropriate depending on the remote user’s needed time of access.


Item Price Change Utility

The Item Price Change Utility on the UM Options Menu allows a user to increase the unit price or the average cost on inventory items by a percentage (up to four (4) decimal points). You can either increase or decrease the price/cost by entering a plus or minus percentage.

You will enter a range of inventory items that you want to include in the price change. You will have the option to change your average cost or the customer’s list price and to enter the percentage to change.

Notes

As an example, a percentage of .05 equals a 5% increase and -.05 will be a 5% decrease.

You will have three rounding options: (D)ollars, 5 (C)ent increments or (N)o rounding. You can opt to be prompted before changing the price/cost on each individual item or let TOP change prices automatically.


Red Hat Linux Print Device Commands


There is a Linux command  lpstat  -t  that will list all of the system print devices. If there are too many lines to completely display all devices on your screen, use the command lpstat  -t  |more.

Each print device has a device name and an individual IP address for each one. Each device will show it is accepting requests and whether or not the device is idle , enabled or currently executing a print job.

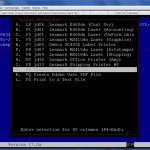
TOP_PRINTER_MENUThe Total Order Plus printer menu will have the print device name before the description of each printer so you can cross reference the two print device names.

Login as root and enter the system password.

#  lpstat -t |more

If a print device shows disabled, you will be able to see the device name i.e.  ps01 disabled. If there are numerous print jobs listed for the disabled print device, you will need to cancel all of them prior to executing the enable command.

# cancel  -a  ps01

# cupsenable ps01

Notes:

There are reasons why a print device might be disabled. If a user takes a printer offline during a print job, if a printer is turned off to try and cancel a print job or CUPS (Common UNIX (Linux) Printing System) will disable a printer if it doesn’t respond after a certain amount of time.

If you want to cancel an individual print job, enter this command:

# cancel ps01-1234  (1234 being the number of the print job)

If you see Network host ‘192.168.1.101’  is busy, it usually means the device is not connected to the network. You can execute the following command to test the connection:

# ping  192.168.1.101

If the device is connected, you will see the data packets that are transmitted and received.

PING 192.168.1.101: 56 data bytes
64 bytes from 192.168.1.101 (192.168.1.101): icmp_seq=0 ttl=60 time=150 ms
64 bytes from 192.168.1.101 (192.168.1.101): icmp_seq=1 ttl=60 time=101 ms

— 192.168.1.101 ping statistics —
2 packets transmitted, 2 packets received, 0% packet loss
round-trip min/avg/max = 101/125/150 ms


Deleting An Inventory Item

TechLine

The Tech Line, by Joanne Simmons


Question:

When I delete an inventory item, I have to spend a lot of time going to each customer’s contract pricing file and remove that item manually. Isn’t there a way to include that file in the deletion process?

Answer:

When an item is deleted in inventory, TOP does a series of checks before removing that item in other files. The item ending balance must be equal to zero and there cannot be any order, invoice or purchase order committed quantities. You will be prompted to answer yes if you want to delete the item if it is a kit component and if you want to confirm the removal of contract prices for that item.

Deleting Inventory Items with Contract Prices

Prior to the new TOP2012 version of Total Order Plus, any time you deleted an inventory item, you would have to manually delete that item out of the contract pricing file for each customer that was getting a contract price on that item.

Now when an item is deleted in inventory, TOP does a series of checks before removing that item in other files. The item ending balance must be equal to zero and there cannot be any order, invoice or purchase order committed quantities. You will be prompted to answer ‘Yes’ if you want to delete the item if it is a kit component and you will also have to confirm the removal of contract prices on each customer for that item.

Set Up TOP Customer Email Contacts

Customer email contacts are set up the same way as other contacts with the exception of the contact type. The contact type must be the same type as in the Email Defaults on the PS Options Menu. The Email Defaults contains a TOP program name and a contact type.

For example, program ARSF40 is the statement print program and may have AP as the contact type. Your email contact would contain the same type in order to email statements to the email address contained in the contact record.

Setting Up TOP Email Parameters

Emailing TOP A/R Statements

To print statements in TOP, access the Accounts Receivable module on the TOP Main Menu -> Select Accounts Receivable System Menu -> Select Period-End Processing Menu -> Select Statement Printing.

The First and Last Customer fields display automatically on your screen. You have the option to override if you are printing statements for one customer or a different range of customers.

Aging Option allows you to print (A)ll statements, statements only with (B)alances or only with balances (O)ver 30 days or balances over (6)0 days. Other options include printing statements that have a credit balance, certain customer types, with a selection option to print (A)ll, (H)ardcopy only, or (E)mail only.

If you select to email statements, you must also select a printer on the TOP printer menu for customers without an email address. The From Address displays from the Email Parameter record or you can override. The To Address must be left blank so it uses the customer’s email address. If you want to email a few statements for testing, you can enter a To Address and they will email to that address.

If you want to send a PDF attachment with each statement, you can enter the file name. The file must be in the EXPORT folder in TOP. If you do not enter the folder name in front of the file name, it will default to the EXPORT folder automatically.

You have three lines of 50 characters each to include a statement message.